
Picky
[EN] Senior Admin
-
Joined
-
Last visited
Everything posted by Picky
-
-
-
Sounds interesting! You have my vote :)
-
-
-
Suggestion: Ability to Remove Vehicle Number PlatesI would like to suggest adding an option for players to remove the number plate from their vehicle. Currently, every vehicle is required to have a visible number plate, which can sometimes limit customization and roleplay possibilities. Allowing players to remove their plates would add more freedom for both vehicle customization and RP scenarios. I think this would be a relatively small addition that could provide a lot more freedom for vehicle builds and create additional RP opportunities.
-
+1 here, I must admit that a lot of nice clothes which is added is way too "BIG". That feeling that you are having Breakfast / Lunch / Dinner in McDonalds. I would look up for something more cozy - well fit. Of course, these outfits are nice for people who roleplay being fat or smth, but for others there are not many options.
-
+1 You barely can adjust yourself, takes a lot of time while you're in the middle of roleplay. Please fix it.
-
+1 good idea
-
I would like to suggest adding an option to permanently remove vehicles obtained from Lucky Spins when the player no longer wants or needs them. For example, I recently got lucky and won a Tulip 2C (ONX modded vehicle) from a Lucky Spin. While winning a vehicle is obviously a nice reward, I personally have no use for this particular car and would rather remove it from my vehicle collection. I completely understand why these vehicles are non-sellable, and I think that part is perfectly fine. However, there should still be a way for players to permanently remove a vehicle from their own possession. Currently, /deletecar does not solve the issue, as it returns the message: The problem is that even a Senior Admin cannot permanently delete the vehicle, meaning the player is essentially stuck with an unwanted vehicle in their garage/vehicle list. Please consider adding a proper permanent vehicle removal option for players.
-
-
Take it far!
-
-
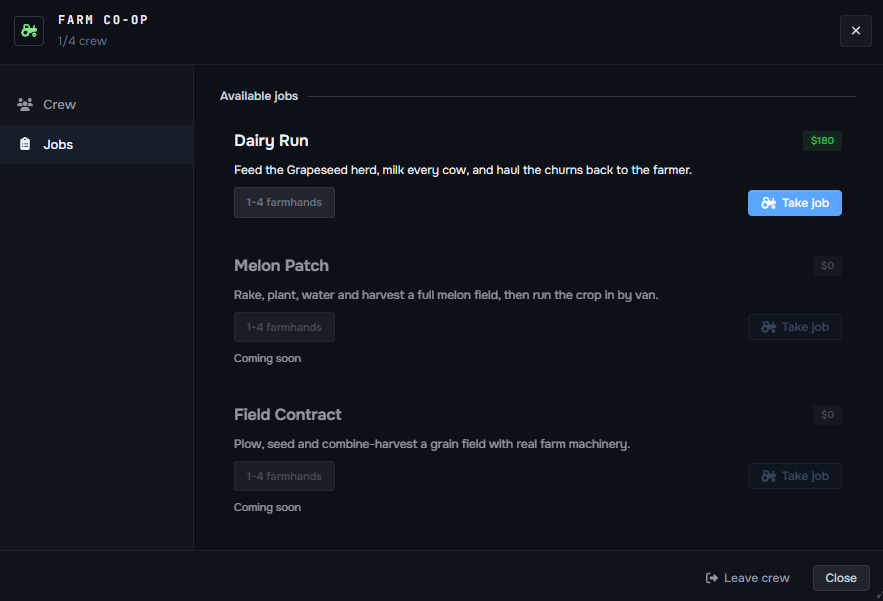
I decided to write a detailed guide for the Farming Job since there are only two scripted jobs left that currently don’t have guides posted. However, after checking the Farming Job myself, I noticed that the current system is quite different from what I initially expected. Instead of planting crops, growing different goods, and eventually harvesting them, the current script seems to be focused almost entirely on getting milk from goats. In my opinion, this system should be reworked and expanded with additional activities and progression options. Otherwise, I’m concerned that the Farming Job will simply become a dead script that very few players will actually want to use or stick with. Right after I joined as an admin, I actually saw a few people actively farming, including planting and growing different goods. Now that functionality appears to be disabled, which is unfortunate because harvesting and crop production would make a lot of sense as higher-rank activities and give players something meaningful to work toward. I believe we could work out a proper progression system with @FatCatTuxedo , including planting, growing, harvesting, different types of crops, and potentially additional farming activities unlocked through higher ranks. This would make the job much more engaging and give players an actual reason to progress instead of repeating the same goat-milking activity. I would like to ask for management approval to look into reworking the Farming Job. If approved, I can discuss the possible mechanics and progression with @FatCatTuxedo and put together a more detailed concept. Please take this suggestion into consideration, and let me know if there are any questions or anything you would like me to clarify. @MelonDisrupt @Luminin @java @Musiceith Thanks!
-
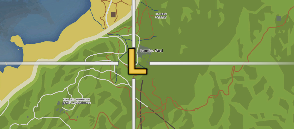
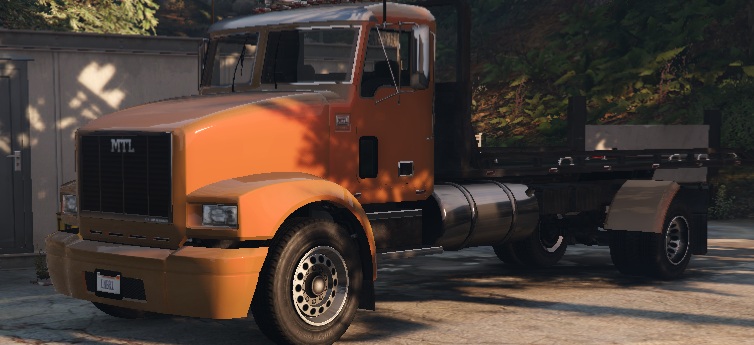
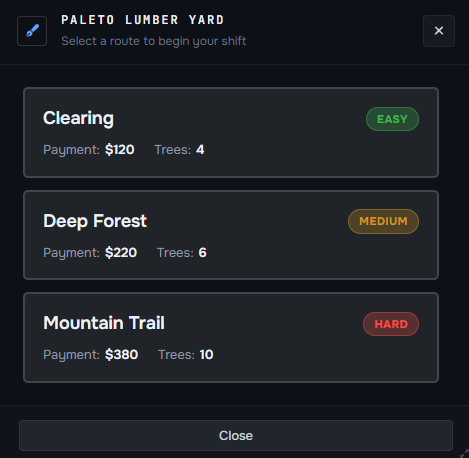
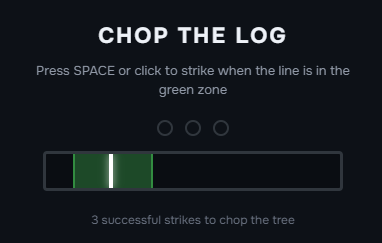
ROLEPLAY PROJECT · LUMBER JOB GUIDE [PICKY 2008/26.01] Welcome to the Lumber Job Guide! If you're looking for a job that combines exploration, physical work, and steady progression, the Lumber Job is a great place to start. As a lumberjack, your task is to head into the forest, cut down trees, collect the wood, and turn your hard work into a reliable source of income. In this guide, we'll walk you through how to start the Lumber Job, how the work process functions, where to collect and deliver materials, and how you can earn money while doing it. Put on your work gear, grab your equipment, and get ready to turn the forests of Los Santos into your workplace. HOW TO START AND WORK THE LUMBER JOB STARTING YOUR SHIFT IMPORTANT Before starting your shift, make sure you're dressed appropriately for the work you're about to do. Lumbering is physical, outdoor work, so wearing a realistic outfit is an important part of maintaining the roleplay atmosphere. Avoid showing up to the Lumber Yard wearing a business suit, formal clothes, or other outfits that wouldn't realistically be worn by someone working in the forest. Instead, choose practical workwear such as a work jacket, shirt, jeans, boots, gloves, or other suitable clothing. Remember, you're playing a role, not just completing a scripted job. Small details like your clothing help make the world feel more realistic for both you and everyone around you. Dress like a lumberjack, act like one, and enjoy the shift! To begin your Lumber Job, you'll first need to make your way to the Lumber Yard, located out in the county. The location is marked on your map with an “L” icon, making it easy to find even if you're visiting for the first time. The Lumber Job is designed to be simple, straightforward, and easy to understand. You won't need to learn a complicated system or remember dozens of different mechanics before getting started. Most of the job is based around a simple routine: drive to the location, cut the trees, collect the wood, load it onto your truck, and bring everything back to the Lumber Yard. After doing it once or twice, you'll quickly get the hang of the entire process. NOTE That said, don't rush through it. You're working with heavy equipment and a work truck, so make sure to drive responsibly and realistically, especially when travelling between the Lumber Yard and the work locations. Take your time, follow the roads, and treat the job like an actual day's work rather than simply driving from point A to point B. CHOOSING YOUR DIFFICULTY Once you've arrived at the Lumber Yard, this is what the working area looks like. Head over to the designated employee and stand nearby, then press E to interact with them. A menu will appear on your screen where you can choose the difficulty of your shift. You will have three difficulty options: 🟢 Easy — fewer trees and fewer work locations. 🟡 Medium — more trees and additional locations to visit. 🔴 Hard — the largest workload and potentially more distant locations. The main difference between the difficulties is how much work you'll have to complete and how many locations you'll need to visit. Higher difficulties can send you to locations that are further away from the Lumber Yard, meaning you'll spend more time travelling between jobs. However, the additional work and longer routes pay off with a higher overall reward, making the harder options worthwhile if you're willing to spend more time on your shift. If you're just starting out, we recommend trying Easy first so you can familiarize yourself with the process. Once you understand how everything works, you can move up to Medium or Hard and take on larger workloads. GETTING YOUR WORK TRUCK After you've selected your preferred difficulty, your duty truck will automatically spawn right next to you. Get inside your truck and prepare to head toward your first work location. Your destination will be clearly marked on your map, so you won't need to search for the location yourself. Simply follow the route and make your way there. Remember that the truck is part of your job, so drive it properly and take care of it. Avoid unnecessary crashes or reckless driving, especially while travelling through the county. CUTTING DOWN THE TREES Once you've arrived at your first location, park your truck properly before starting your work. You'll need to load the wood you've collected into the truck, so make sure you leave yourself enough space to work around the vehicle. Approach one of the marked trees and press E to begin lumbering. INFO - LUMBERING MINI-GAME Cutting down a tree isn't completely automatic. When you start lumbering, a small mini-game will appear on your screen. You'll need to click your mouse when the indicator reaches the correct area on the line. You will need to successfully hit the target area three times to complete the lumbering process. Pay attention to the indicator and time your clicks carefully — missing the correct area may slow you down or require you to try again. Once you've successfully completed all three clicks, the tree will be ready to collect. Your character will start working on the tree, and once the process is complete, press E again to collect the finished goods. After collecting the wood, return to your truck and press E once more to load the materials into the vehicle. Repeat this process for every tree at the current location. Once you've finished all the trees, get back into your truck and continue to the next location shown on your map. Depending on the difficulty you selected, you may have several locations to visit. Some locations can be quite far from the Lumber Yard, so be prepared for a bit of driving between them. Don't worry if the route takes some time — the additional workload is what makes the higher difficulty levels more rewarding. COMPLETING YOUR SHIFT Once you've visited all assigned locations and collected all of the required goods, it's time to return to where your shift started. Drive the loaded truck all the way back to the Lumber Yard and park it in the designated area. Once you press E inside your vehicle at the yard, the duty truck will automatically despawned, meaning you don't need to return it manually or perform any additional steps. The entire job follows a very simple cycle, so after your first run you'll already have a good understanding of how everything works. Choose your difficulty, drive to the locations, cut and collect the wood, load your truck, and bring everything back to the yard. YOUR SHIFT STARTS HERE! Every shift in the forest is another step toward becoming a true lumbering professional. Start by learning the basics, master the art of cutting and collecting timber, take on more challenging routes, and work your way toward larger and more rewarding jobs. The more experience you gain, the more confident and efficient you'll become. So put on your work clothes, grab your axe, get behind the wheel, and head into the county - your lumbering career starts here! [PICKY 2008/26.01]

-
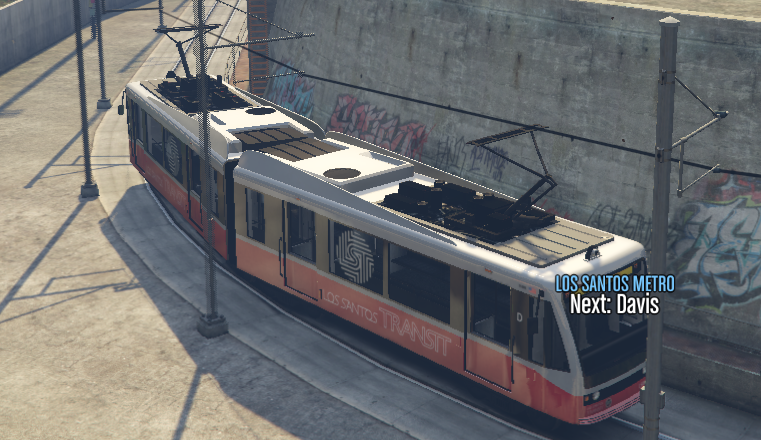
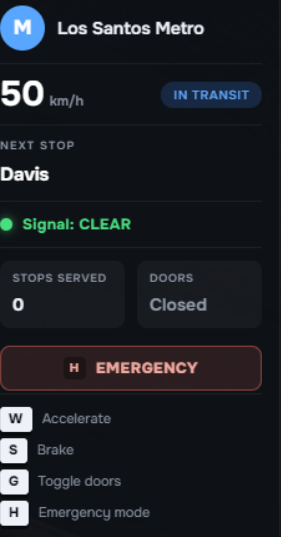
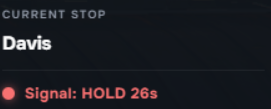
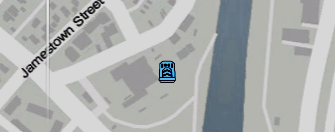
ROLEPLAY PROJECT · METRO JOB GUIDE [PICKY 1908/26.01] Welcome to the Metro Job Guide! The Metro Job is a unique opportunity to experience Los Santos from behind the controls of the city's public transportation system. As a Metro Driver, your responsibility is to operate trains safely, follow designated routes, and transport passengers across the city. Whether you're looking for a relaxing way to earn money or simply want to experience a different kind of job, the Metro Job offers a straightforward and enjoyable gameplay experience. Take your time, follow the instructions, and most importantly — drive safely and realistically. Your passengers are counting on you to get them where they need to go. HOW TO START AND WORK THE METRO JOB STARTING YOUR SHIFT Once you've decided to become a Metro Driver, your first step is to head to the designated Metro location. Open your map and look for the blue train icon, then follow it to the starting point of the job. Once you've arrived at the Metro station, approach the job menu and press E to start your shift. You will be spawned directly inside the Metro train, ready to begin your duties. IMPORTANT At the moment, the Metro Job can only be operated by one player at a time. If another player is already working as a Metro Driver, you will not be able to start the job until their shift has ended. DRIVING THE METRO Right after you've spawned inside the Metro, your journey begins. Follow the designated line and make your way to your first station. Each station is an important part of your shift. When you make a proper stop at a station, you'll receive XP and money for completing the stop. IMPORTANT Make sure you actually stop at every station. If you pass a station without stopping, you will not receive the XP or payment for it. Passengers waiting at that station will also have to wait until you complete the full circle and return. Stay focused and keep an eye on your route! METRO INFORMATION While driving, you'll find an information panel on the right side of your screen. This panel displays important information such as: Your current speed The name of your next Metro station Other useful information related to your current journey Use this information to stay aware of what's ahead and prepare for your next stop. EMERGENCY BUTTON The Emergency button is designed specifically for roleplay situations. If you need to leave your Metro during your shift, you must press the Emergency button before exiting. If you leave without using it, your Metro will disappear, allowing another player to take the Metro Job. The Emergency button allows you to realistically end your current journey when something happens that requires you to leave the train. You can use the Emergency button to stop your service, exit the Metro, and properly roleplay the situation. IMPORTANT Use the Emergency button for appropriate roleplay situations and always exit your Metro properly! PASSENGER BOARDING Every time you arrive at a station and make your stop, a 30-second passenger boarding timer will begin. During this time, passengers have the opportunity to enter the Metro. You will not be able to move the train until the timer has finished, so don't worry about waiting — it's part of the job! At each station, players waiting for the Metro will also see an estimated arrival timer showing how long it will take for your train to reach them. This timer automatically calculates your estimated arrival based on your current speed, meaning you don't need to rush or drive recklessly to reach the next station. Take your time, drive safely, and enjoy the Metro roleplay experience to its fullest. YOUR SHIFT STARTS HERE! And that's everything you need to know about the Metro Job! While the job itself is relatively simple, it offers a unique and interesting experience that you won't find in many other jobs around Los Santos. From operating the Metro and making scheduled stops to seeing players waiting for your arrival, every shift gives you an opportunity to enjoy a different side of the city. You don't need to rush - stay focused, drive safely, make your stops, and enjoy the roleplay. Sometimes, the simplest jobs can create some of the most enjoyable experiences. [PICKY 1908/26.01]



-
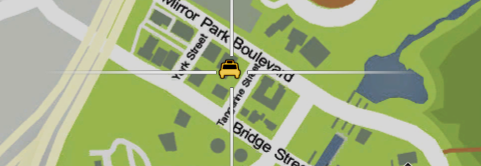
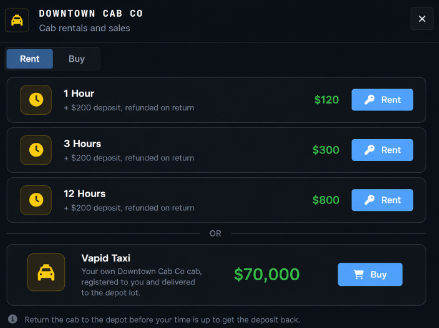
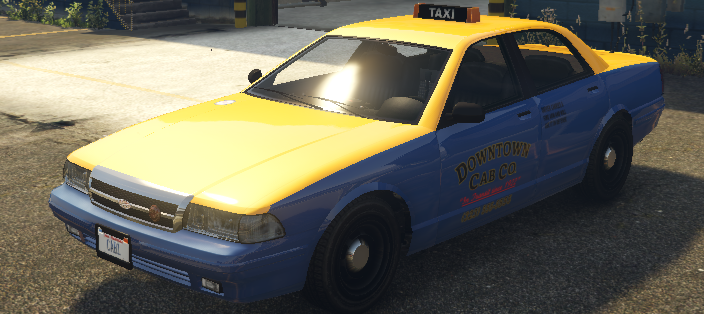
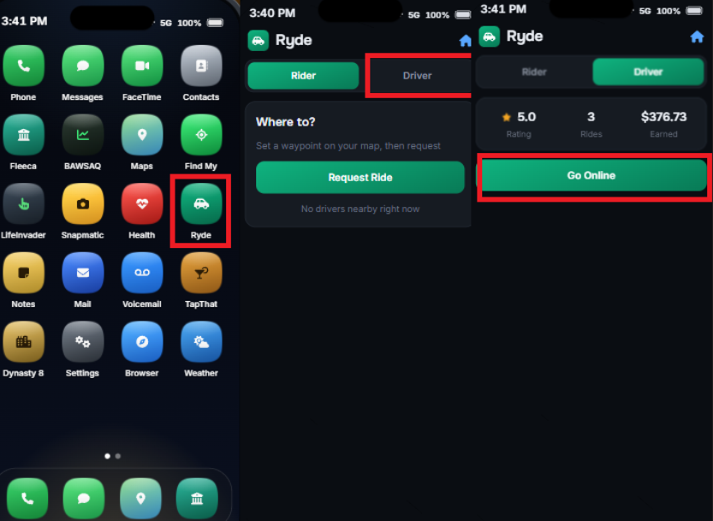
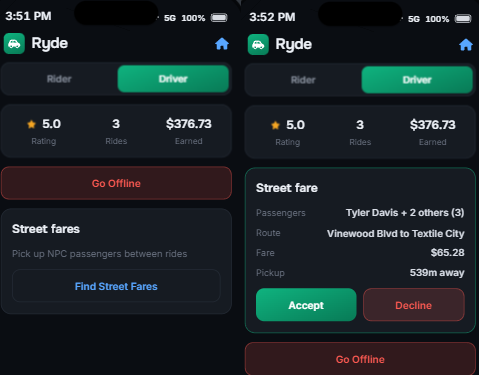
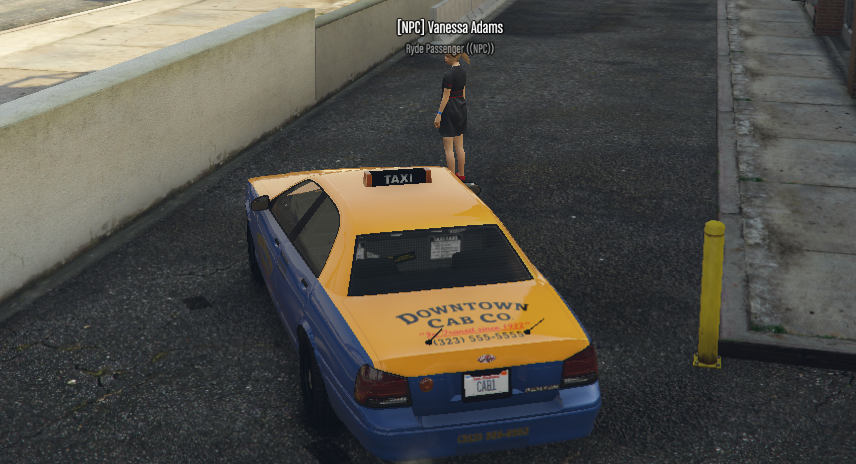
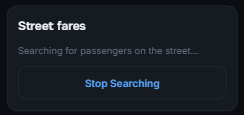
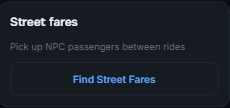
ROLEPLAY PROJECT · TAXI JOB GUIDE [PICKY 1908/26.01] Welcome to the Taxi Job Guide! Your chance to hit the streets of Los Santos, meet new passengers, and become one of the city's most reliable drivers. Whether you're looking for a steady source of income, enjoy driving around the city, or simply want a job that keeps you moving, the Taxi Job offers a simple yet engaging way to earn money while providing an essential service to the community. In this guide, you'll learn everything you need to know to get started, from beginning your shift and choosing your taxi to accepting passenger requests, completing rides, and earning your pay. We'll also cover the available taxi options, job progression, and useful tips to help you become a more efficient and successful taxi driver. INFO Before starting your career as a Taxi Driver, make sure you have a valid Taxi License. Operating a taxi without the required license may lead to issues during your shift. You can purchase your Taxi License at any Department of Motor Vehicles (DMV) location. HOW TO START AND WORK THE TAXI JOB To begin your taxi duty, first make your way to the Taxi Job location. Open your map and look for the yellow vehicle blip — this marks the location of the taxi depot where you can start your career behind the wheel. Once you arrive at the depot, you'll be presented with several options by pressing E for how you want to get started. You can either rent a taxi for a set amount of time or purchase your own taxi to use for your work. If you're just starting out, renting a taxi is highly recommended. You can rent a vehicle for 1 hour, 3 hours, or 12 hours, allowing you to try the job and see if it's something you enjoy before making a larger investment. Buying your own taxi can be useful later on, but there's no need to rush into purchasing one before you've had a chance to experience the job. Choose the option that suits you best, get behind the wheel, and you're ready to start your taxi duty! STARTING YOUR SHIFT Once you have rented or purchased your taxi, the vehicle will spawn right next to you, ready for you to begin your shift. Get into your taxi and prepare to start working. However, simply entering the vehicle does not automatically make you available for passengers. You must activate yourself as a taxi driver before you can begin receiving ride orders. After activating your taxi driver status, you will become available for incoming passenger requests and can begin accepting rides around Los Santos. Get in, activate your driver status, and wait for your first passenger. IMPORTANT This job allows you to drive NPC passengers, meaning you don't have to rely on real players being around to receive taxi orders. Even if the streets are quiet and there aren't many players around, you can still enjoy your shift and earn money as a taxi driver. To receive your first NPC passenger, simply open your mobile app and press the designated button. Once activated, you'll receive your first pickup location and can begin your journey! Remember: Drive realistically, follow traffic rules, and treat every passenger as if you're providing a real taxi service. Even having an NPCs in your car, you're responsible to drive realistically! Once you've arrived at the pickup location, you'll see your NPC passenger(s) waiting for you. You can have a maximum of 3 passengers inside your taxi at the same time, so they spawn randomly, it might be from 1 up to 3 passengers at one pick-up location. Park your taxi close to the passengers and make sure they have enough space to get inside. Once you're positioned correctly, the NPCs will eventually enter your vehicle. After all passengers have entered the taxi, your GPS will automatically update with their final destination. Simply follow the route on your map and drive them safely to their destination. Once you've successfully reached the passenger's destination, your ride will be completed automatically and the fare will be paid directly into your account. After completing the ride, your mobile application will automatically switch to the "Street Fares" menu. This means you're now available to receive a taxi request from a real player. INFO If there aren't enough players online and you don't want to wait for a real player to request a taxi, you can continue taking NPC fares. Simply press "Stop Searching", then select "Find Street Fares" to receive another NPC ride and continue your shift. YOUR SHIFT STARTS HERE! And that's everything you need to know to get started as a Taxi Driver! Whether you're picking up real players or transporting NPC passengers, every ride is an opportunity to earn money and enjoy your shift on the streets of Los Santos. Remember to drive realistically, follow traffic rules, communicate properly with your passengers, and provide a smooth and professional taxi service. If there aren't enough players requesting rides, you can always switch back to NPC fares and keep your shift going. Now that you know how everything works, it's time to get behind the wheel, start your engine, and hit the streets! Your passengers are waiting — good luck, drive safe, and enjoy your shift! [PICKY 1908/26.01]
-
-
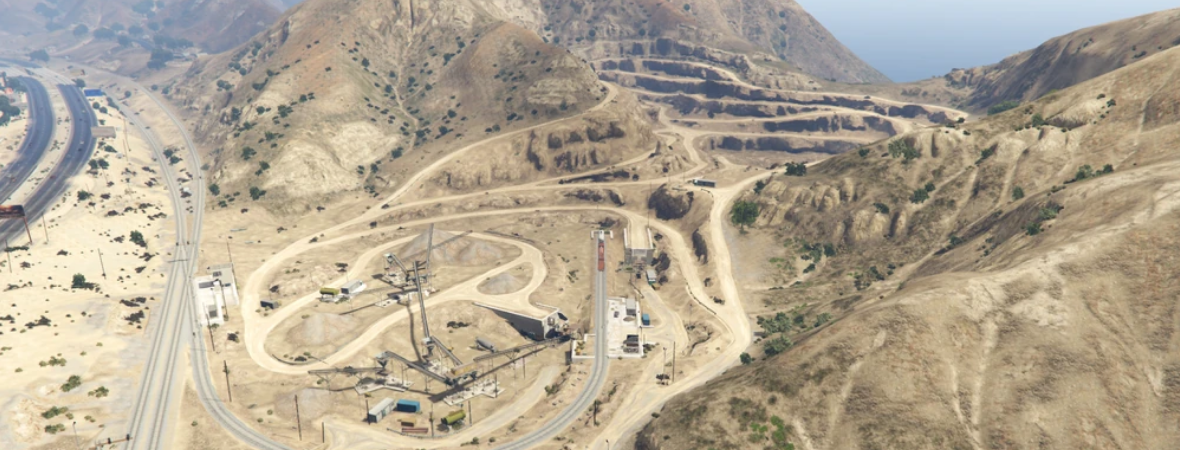
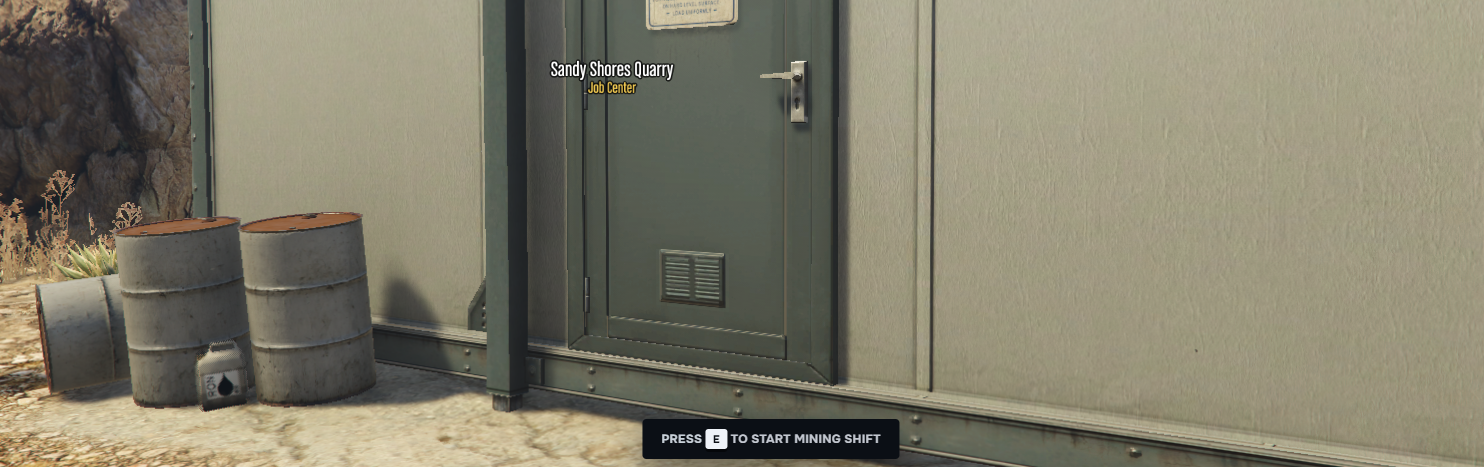
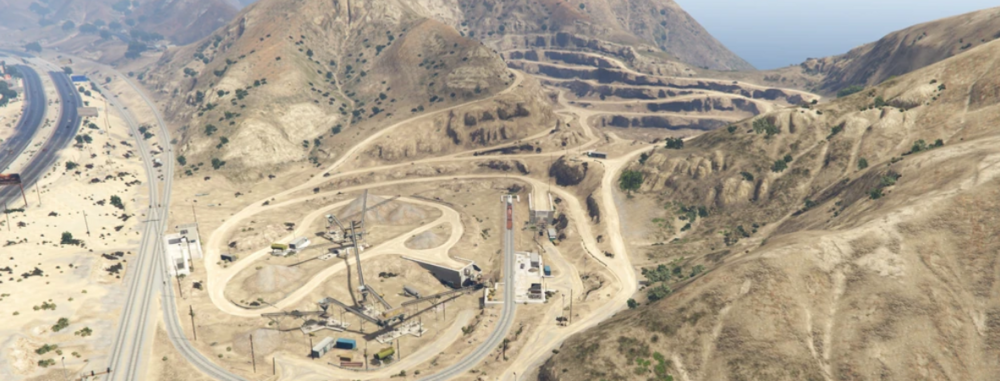
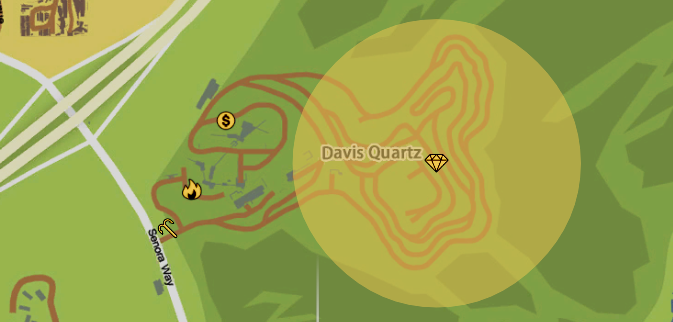
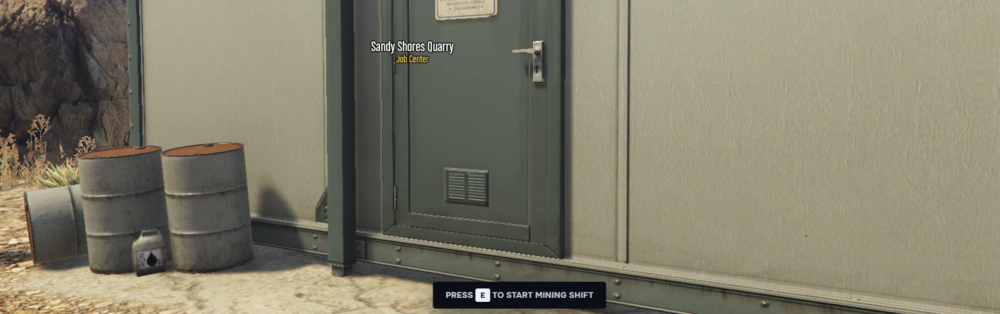
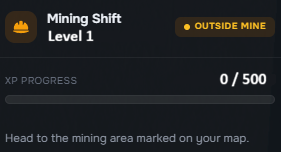
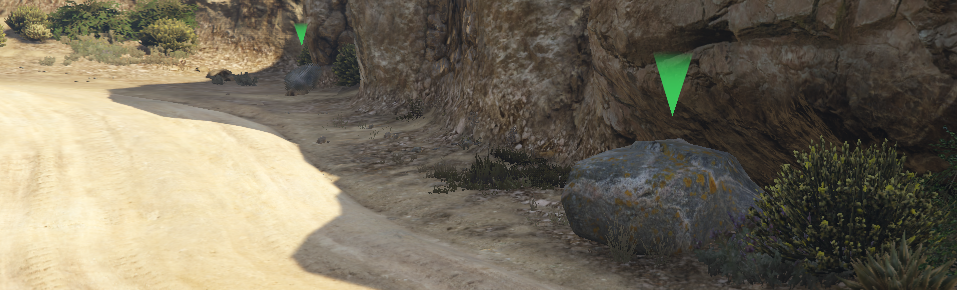
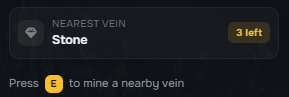
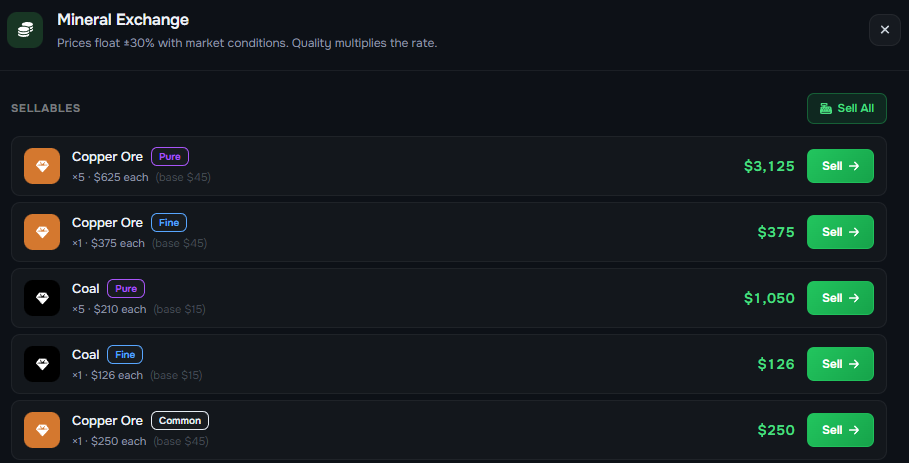
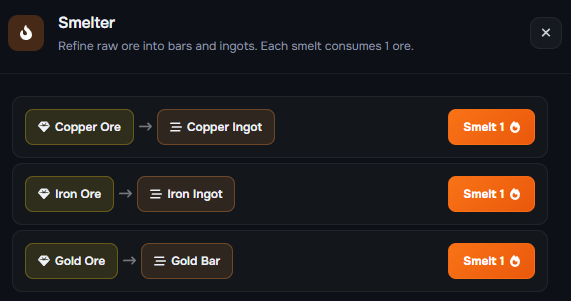
ROLEPLAY PROJECT · MINING JOB GUIDE [PICKY 1808/26.01] Welcome to the Ultimate Mining Job Guide! Embark on a journey into the fascinating world of mining—a profession rooted in exploration, skill, and opportunity. Whether you're a beginner eager to learn how to start mining or a seasoned miner looking to level up, this guide is your comprehensive resource. Inside, you'll discover what this exciting job entails, from the basics of getting started to advanced techniques that maximize your efficiency. We’ll explore the various levels within the mining hierarchy, showing you how to progress and unlock new possibilities. As you rise through the ranks, you'll gain access to better tools, higher rewards, and exclusive opportunities that can transform your mining experience. Get ready to dig deep, unlock hidden treasures, and build a prosperous mining career. Let’s begin your adventure into the world beneath the surface! What this guide covers: ⛏️ How to Start Mining — Basic information on how to begin working as a miner and what you need before starting. 📋 Mining Basics — How the job works and the important things to take into consideration while mining. 📈 Mining Level Structure & Progression — How the level progression system works and when new minerals and smelting options become available. HOW TO START AND WORK THE MINING JOB To begin your career as a miner, you will first need to make your way to Davis Quartz, the main quarry where the Mining Job takes place. This is where your entire mining shift begins, from clocking in and collecting your equipment to extracting valuable minerals from the quarry. Once you arrive at Davis Quartz, you will notice four different locations marked on your map. Each blip represents an important part of the Mining Job: 💲- Location where you can sell your minerals after successfully mining them. 🔥- Smelter, where you can process your ores into refined materials. How smelting works and when you unlock each material will be explained further in the guide. ⛏️ - Mining Job starting point, where you begin and finish your duties. 💎- Quarry, where the main mining activity takes place. This is where you will work, roleplay as a miner, and search for valuable minerals. STARTING YOUR SHIFT Once you've arrived at Davis Quartz, your first destination should always be the ⛏️ Pickaxe location. This is where you officially start your mining shift. Walk up to the marked area and press E to start your duties. After pressing E, your mining shift will begin and you will be ready to head into the quarry and start working. Once your shift has started, you will also see an information menu on the right side of your screen displaying your current Mining XP and your progression toward the next level. From here, make your way toward the 💎 Diamond marker — this is where the actual mining activity takes place. ARRIVING AT THE QUARRY Once you've arrived at the 💎 Diamond location, you are now at the actual quarry where the main mining activity takes place. Throughout the quarry, you will notice multiple RED and GREEN information markers. These markers indicate the minerals available at each mining location and whether your current Mining Level allows you to access them. The system is simple: 🟢 GREEN — The mineral is currently available for you to mine. 🔴 RED — The mineral is currently locked because your Mining Level is not high enough. As you progress through your mining career and increase your level, more valuable minerals will become available to you. You will begin with the basic resources and gradually work your way toward more expensive and rare materials. MINING PROGRESS & ATTEMPTS While working at the quarry, the information menu on the right side of your screen will also display your remaining mining attempts for the current location. This allows you to keep track of how many times you can mine before you need to move on or manage your resources. IMPORTANT ! Your Mining XP will stop progressing when your inventory is full or overloaded. Make sure you regularly check your inventory and unload your collected minerals into your vehicle's trunk. Do not wait until your inventory is completely overloaded — keeping your inventory under control will allow you to continue gaining XP and progressing through your Mining Levels. SELLING YOUR MINERALS Once you've collected enough minerals, it's time to turn your hard work into profit. Head back to the $ marker. This is the location where you can sell the minerals you've collected during your shift. Walk up to the selling point and press E. A selling menu will appear, allowing you to choose which minerals you would like to sell and which ones you would prefer to keep. Select the minerals you want to sell, confirm the transaction, and collect your earnings. You can then return to the quarry and continue mining. Keep in mind that progressing to higher Mining Levels gives you access to more valuable resources, meaning your potential earnings can increase as you advance through the Mining Job. Once you've finished working for the day, simply return to the ⛏️ Pickaxe marker where you originally started your shift. Press E to end your duties and finish your Mining Job. However, if you're not ready to call it a day, you're completely free to continue working. Restock your supplies, unload your minerals, return to the quarry, and keep mining to gain more XP and work your way toward the next Mining Level. IMPORTANT ! Please make sure to roleplay properly and realistically while working as a miner. Do not rush through the job simply to farm money or XP. You are part of a roleplay server, and maintaining a high standard of roleplay helps create a better experience for everyone around you. Take your time, play the role, and enjoy the journey from a beginner miner to one of Los Santos' most experienced quarry workers. MINING LEVEL STRUCTURE & PROGRESSION The Mining Job features a 50-level progression system, with new minerals and processing options becoming available as you advance. Rather than having every level explained individually, the progression is built around several important level milestones that unlock access to new resources and higher-value opportunities. Your Mining Level determines which minerals you are able to extract from the quarry. As you level up, previously unlocked minerals remain available. Reaching a new milestone simply adds new resources to the pool of minerals you can find while mining. The Smelter is an important part of the Mining Job, allowing you to process the ores you have collected and turn them into more valuable refined products that can be sold afterward. The higher your Mining Level, the more valuable materials you can process. Keep progressing through the levels to unlock the full potential of the Smelter. LEVEL 1 - BASIC MINERALS Every miner begins at Level 1. At this stage, you are introduced to the fundamentals of mining and can begin extracting the most common materials. AVAILABLE MINERALS Coal Stone These basic resources are the foundation of your mining career and allow you to gain experience and progress toward higher levels. LEVEL 5 - COPPER & IRON Level 5 is the first major milestone in your mining career! Once you reach Level 5, you unlock the ability to mine new minerals: AVAILABLE MINERALS Coal Stone Copper Ore Iron Ore This is also the level where Copper and Iron become available at the Smelter. The Smelter allows you to take the minerals you have collected and process them into a more valuable refined product, which can then be sold for additional profit. In other words, mining the ore is only one part of the process — smelting allows you to turn your collected resources into more valuable materials before selling them. LEVEL 20 - GOLD At Level 20, you unlock Gold Ore, giving you access to a significantly rarer and more valuable resource. At the same level, Gold is also unlocked at the Smelter. AVAILABLE MINERALS Coal Stone Copper Ore Iron Ore Gold Ore This means that once you reach Level 20, you can mine Gold Ore, process it through the Smelter, and turn it into a more valuable refined product that can be sold afterward! LEVEL 40 - DIAMOND & EMERALD Level 40 is the final major mineral unlock. At this level, you gain access to the rarest resources available in the Mining Job. AVAILABLE MINERALS Coal Stone Copper Ore Iron Ore Gold Ore Diamond Ore Emerald Both materials also become available for processing through the Smelter. These resources are significantly rarer than the lower-tier minerals, making them an important part of the progression toward becoming a high-level miner. MINERAL SPAWN CHANCES (%) Not every mining location will produce the same mineral. Each resource has its own spawn chance, with common materials appearing much more frequently than rare ones. CHANCES OF SPAWN 🥇 Gold — 3% ⚙️ Iron — 7% 🪨 Stone — 45% 🟠 Copper — 13% 💎 Diamond — 1.5% 💚 Emerald — 0.5% This means that Stone is the most commonly found resource, while Emerald is one of the rarest, with only a 0.5% chance to spawn. Rare resources such as Gold, Diamond, and Emerald require both the appropriate Mining Level and a successful spawn, making them much more valuable when you manage to find them. YOUR SHIFT STARTS HERE! Every level brings you closer to becoming a true master of the mines. Start with the basics, learn the trade, work your way through Copper, Iron, and Gold, and eventually earn access to the rarest resources in the job. The deeper you progress, the greater the rewards — so grab your equipment, head into the mines, and start building your mining career! [PICKY 1808/26.01]


-
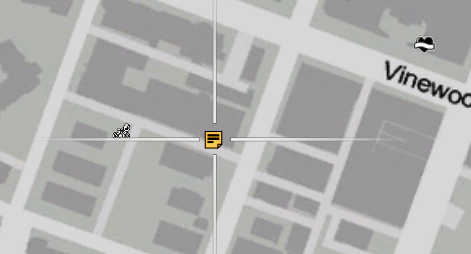
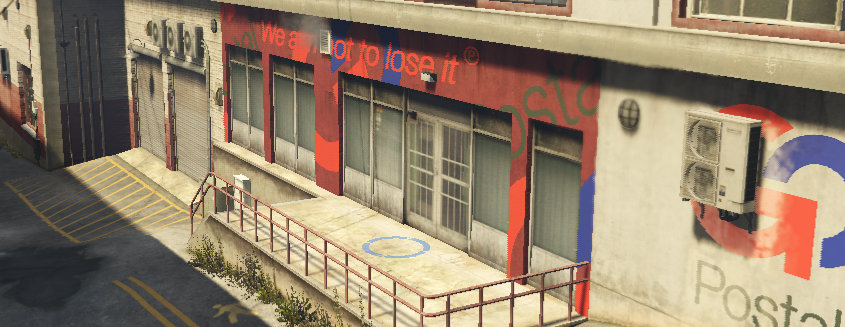
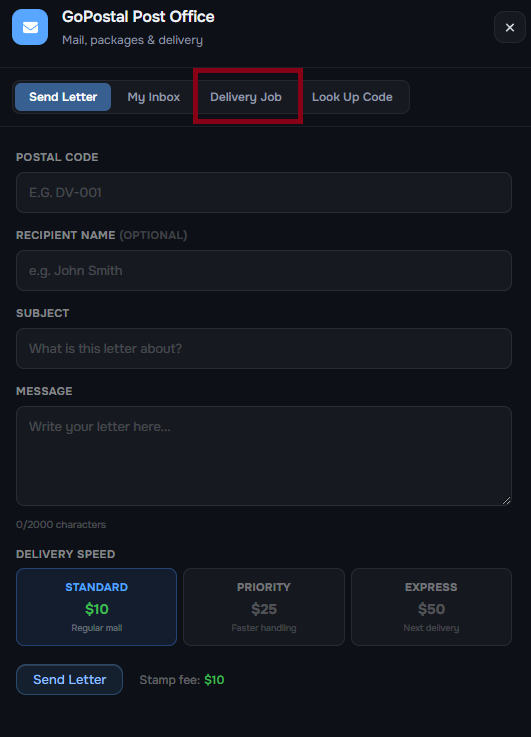
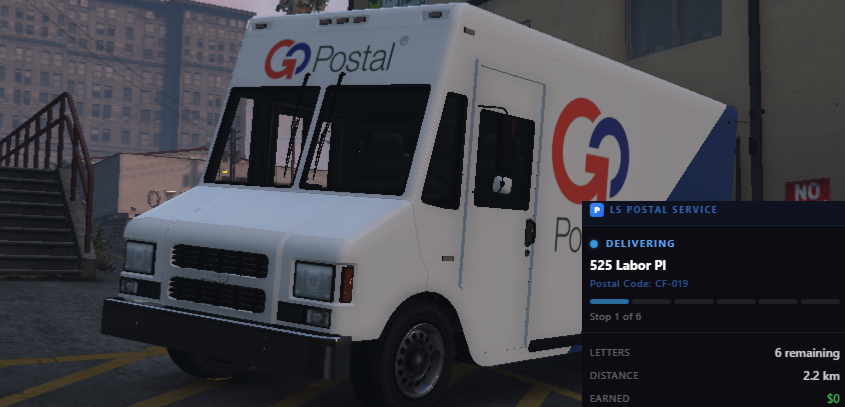
ROLEPLAY PROJECT · POSTAL JOB GUIDE [PICKY 1708/26.01] Welcome to the Postal Job on the RPP Server! The Postal Job is a simple and beginner-friendly profession focused on delivering mail and packages around Los Santos. It is an easy and quick job to complete, making it a great option for players looking for a straightforward way to earn money without spending too much time on a single route. While the Postal Job offers lower payouts compared to some other professions, its main advantages are speed, simplicity, and accessibility. It is ideal for players who want a quick and reliable source of income. This guide will cover everything you need to know, from starting the job and completing deliveries to understanding routes and maximizing your efficiency. What this guide covers: 📮 How to start and work the Postal Job 🚚 How the delivery system works HOW TO START AND WORK THE POSTAL JOB To begin your shift, you must first travel to the designated Postal job location. On the map, look for the yellow paper icon: Upon arrival Postal Job location would be found here: Right after you press E to open the postal menu, you’ll be greeted with the interface shown above. From here, head over to the "Delivery Job" section to see everything you need for your daily postal work. In this section, you’ll be able to check how many letters and packages are currently available and ready to be delivered, as well as see the payment you’ll receive for each completed delivery. Take a quick look, choose your deliveries, and hit the road - every successful delivery brings you a little closer to becoming one of Los Santos’ most reliable postal workers! HOW THE DELIVERY SYSTEM WORKS Once you’re ready to get started, simply click "Start Your Shift". Your postal vehicle will be spawned for you, and you’ll also notice a progress menu on the right side of your screen. This will help you keep track of your current deliveries and see how much work you have left to complete. As you make your way through Los Santos, keep an eye on your map for the green delivery blips. These mark the addresses where your next delivery needs to be made. Once you arrive at the location, park up nearby and press E to deliver the post. The delivery will be completed immediately, and you can continue on to your next stop.

-
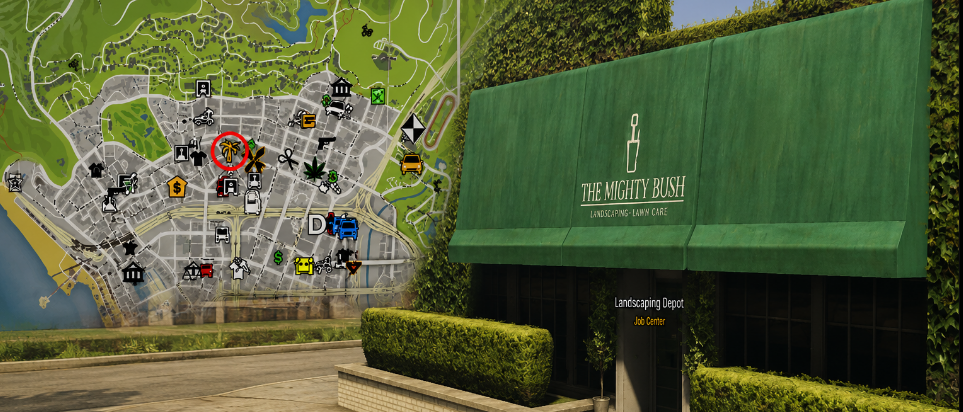
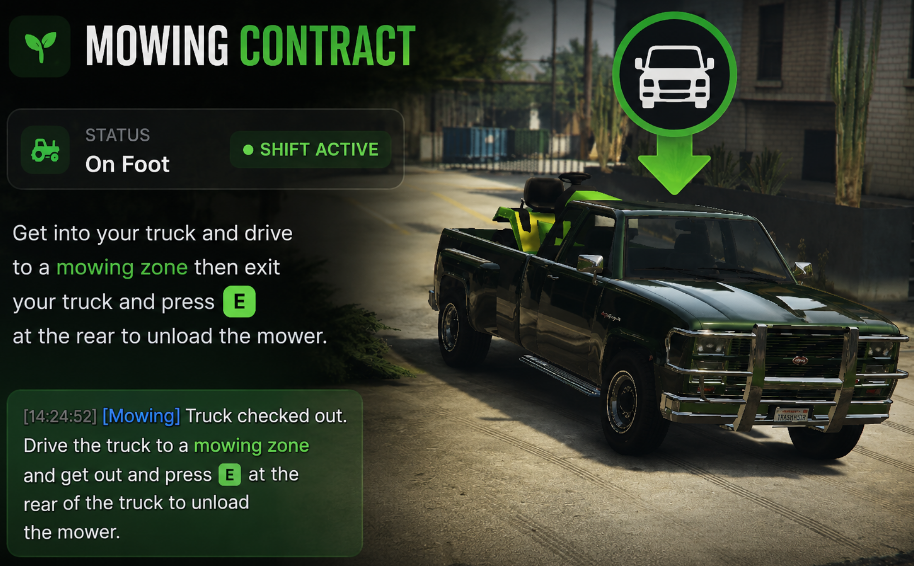
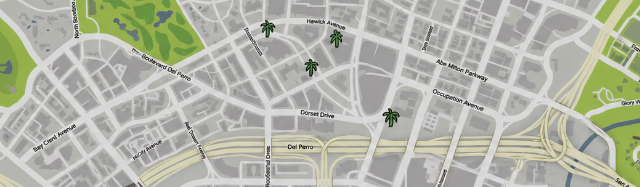
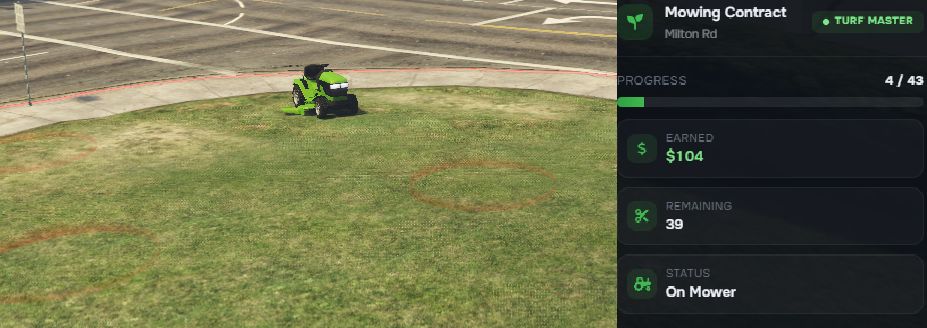
Roleplay Project · MOWER JOB GUIDE [Picky 1408/26.01] Welcome to the Mower Job on the RPP Server. The Mower Job is a straightforward landscaping profession focused on maintaining public and private areas around Los Santos. As a mower, your responsibility is to keep designated areas clean and well-maintained by operating the assigned lawn mower and completing your mowing routes. This job is designed to provide a simple and relaxing way to earn money while encouraging realistic roleplay. Players are expected to dress appropriately for outdoor landscaping work, operate their equipment responsibly, and follow the designated work procedures throughout their shift. Whether you're looking for a casual job, want to earn some extra money, or simply want to experience another civilian profession, this guide will explain everything you need to know about starting and working as a Mower. What this guide covers: 🚜 How to start and work the Mower Job 👕 Appropriate clothing and roleplay expectations 📈 How the mower level and progression system works HOW TO START AND WORK THE MOWER JOB 👕 Clothing & Roleplay Requirements Before beginning your career as a Mower, there are a few requirements and roleplay standards you must keep in mind. This job is built around realistic landscaping and groundskeeping work, so players are expected to portray the role appropriately and maintain a believable appearance and behavior throughout their shift. Suitable work clothing and appropriate footwear MUST be worn while working as a Mower. When operating a lawn mower, you are expected to maintain realistic roleplay and dress appropriately for the work you are performing. Professional landscaping involves spending extended periods outdoors, operating mowing equipment, working around grass and vegetation, and performing physical outdoor labor. Your character should therefore be dressed as an actual landscaping or groundskeeping worker would be. For example: Appropriate work clothing should be worn. Suitable and practical footwear must be worn. Protective footwear should be used when appropriate for the work. Work gloves and other protective equipment should be used when required. Avoid wearing sportswear, suits, expensive formal clothing, or other outfits that would be unrealistic for landscaping work. Do not operate a lawn mower while dressed in clothing that would not reasonably be worn by a professional groundskeeper. ⚠ Your roleplay portrayal should remain realistic at all times. You cannot reasonably expect to spend your shift mowing lawns while wearing a designer suit, expensive formal clothing, or an outfit completely unsuitable for outdoor manual labor.This is not only about following the clothing requirement — it is about maintaining the overall roleplay quality and realism of the job. Treat your work, equipment, and responsibilities as you would if you were actually employed as a professional landscaper. 🚜 Operating the Mower Once you have met the requirements and arrived at the job location, you will be provided with a dedicated lawn mower for your shift. Before beginning your route, make sure you are familiar with the equipment you will be operating. The mower is a piece of landscaping machinery, and your driving and behavior should reflect its purpose. When operating the mower: Avoid reckless or unnecessary driving. Operate the equipment carefully around pedestrians and other people. Be mindful of roads, sidewalks, buildings, vehicles, and surrounding objects. Remain within the designated work areas while mowing. Avoid damaging the mower through careless or reckless operation. Maintain realistic roleplay throughout your entire shift. ⚠ Remember that you are operating landscaping equipment, not simply using a vehicle to travel around Los Santos. Your movements and behavior should reflect someone who is actually performing groundskeeping work. NOTE: The goal is to portray an actual professional landscaper completing their assigned mowing work, rather than simply using the mower as a means of travelling from one location to another. Your clothing, driving, behavior, and overall roleplay should reflect the responsibilities that come with performing professional landscaping work. How the mower level and progression system works: Level 1 - Garden Hand - 0xp Level 2 - Mower Operator 200xp Level 3 - Landscaper - 600xp Level 4 - Head Groundskeeper - 1500xp Level 5 - Turf Master - 3200xp Before beginning your shift, you first need to locate the Mower Job on your map. Look for the yellow palm tree icon on the map. This icon marks the location where the Mower Job can be started. On the map below, the yellow palm tree highlighted by the red circle is the location you need to visit. Once you arrive, approach the Mower Job marker. Press E to interact with the job and begin the process. ⓘ An information menu will also appear on the right side of your screen with details about your current duty. Once you're inside your vehicle, check the map to find the green palm icons — these mark the available locations where you can work. Choose a location and drive there to begin your mowing job. Upon arriving at the location, park your truck properly and exit the vehicle. Go to the rear of the truck and press E to unload your mower — it will be unloaded immediately and ready for use. Once you start working with the mower, you will see red blips marked on the grass. Each location can have a different number of red blips depending on the size of the job. You can check your progress and see how many areas are remaining on the right side of your screen. Drive your mower to each red-marked area and complete the mowing — you will receive your payment immediately after completing each red point. Once all red points have been completed, drive back towards your vehicle and press E at the back of the truck to load the mower back onto the vehicle. You can then continue to your next desired location, or if you are finished working, return to the depot and press E to return the duty vehicle and end your shift. ! YOUR SHIFT STARTS HERE! Grab your mower, head out to the grass, and get to work. Every area you mow, every red point you complete, and every job you finish puts you one step closer to becoming one of Los Santos’ most reliable landscapers. Keep your mower running, take care of every location, and keep Los Santos looking fresh and clean! [Picky 1408/26.01]
-
Congratulations all. I am late.
-
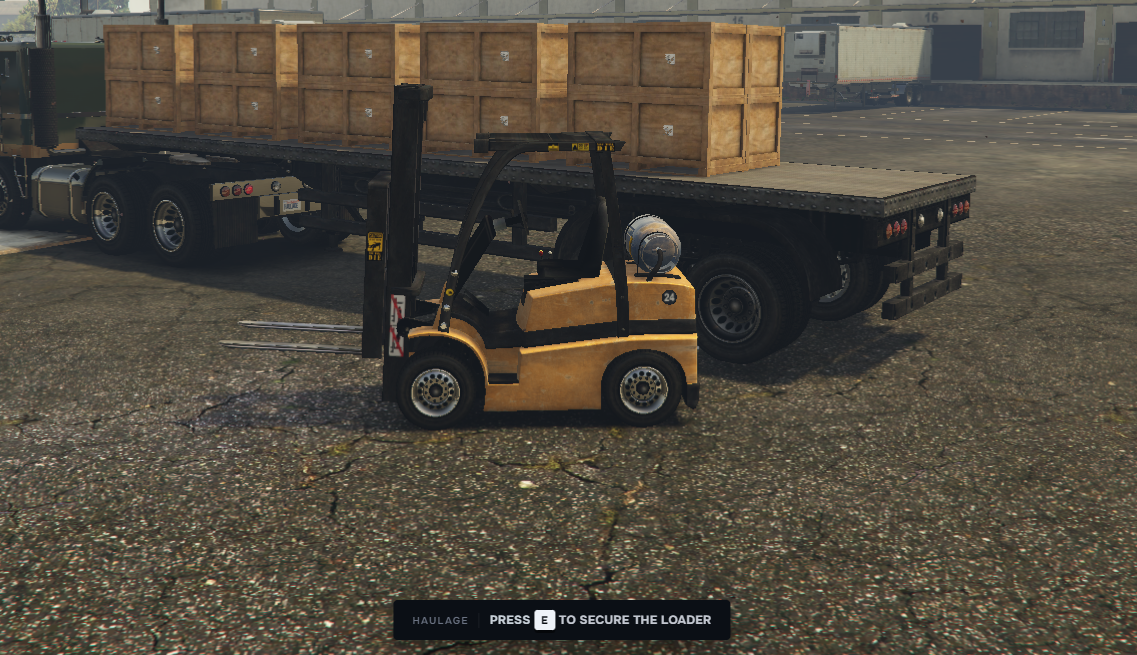
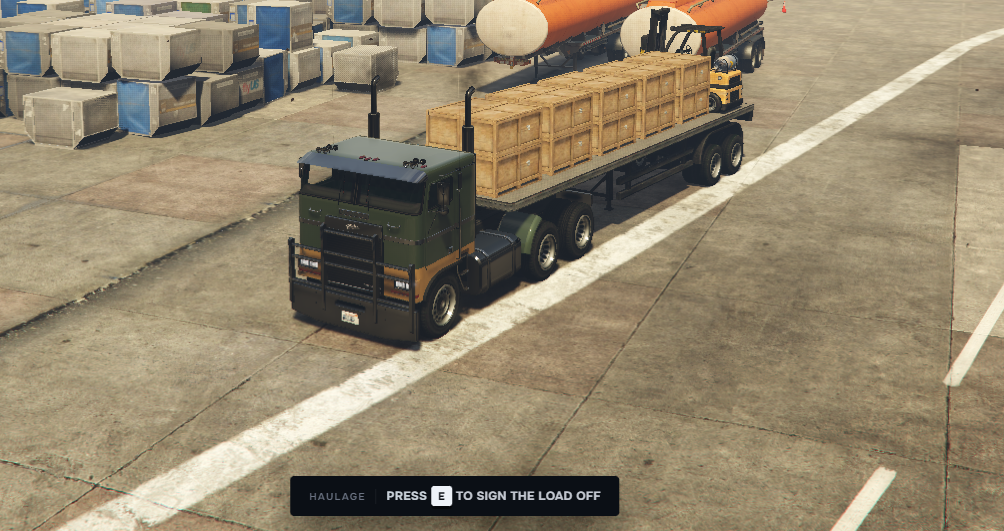
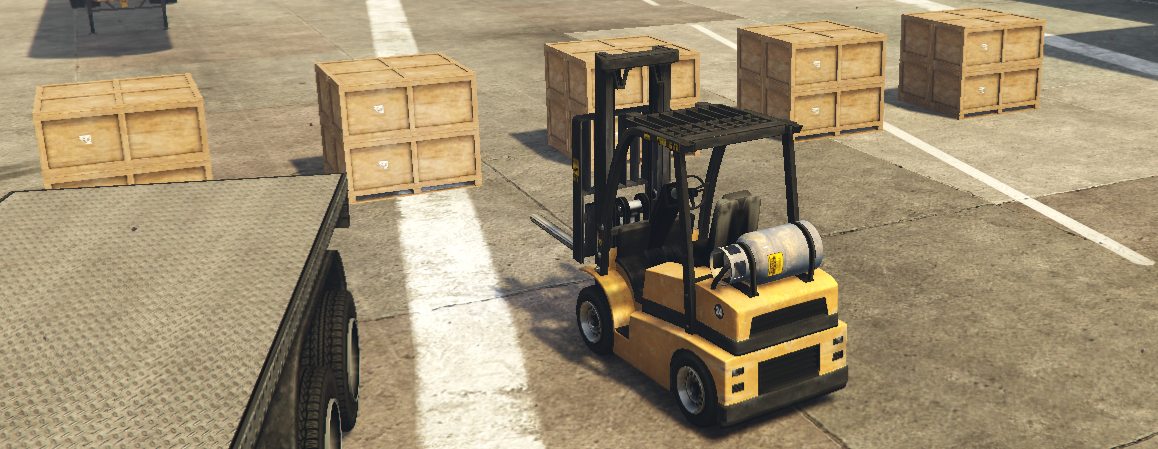
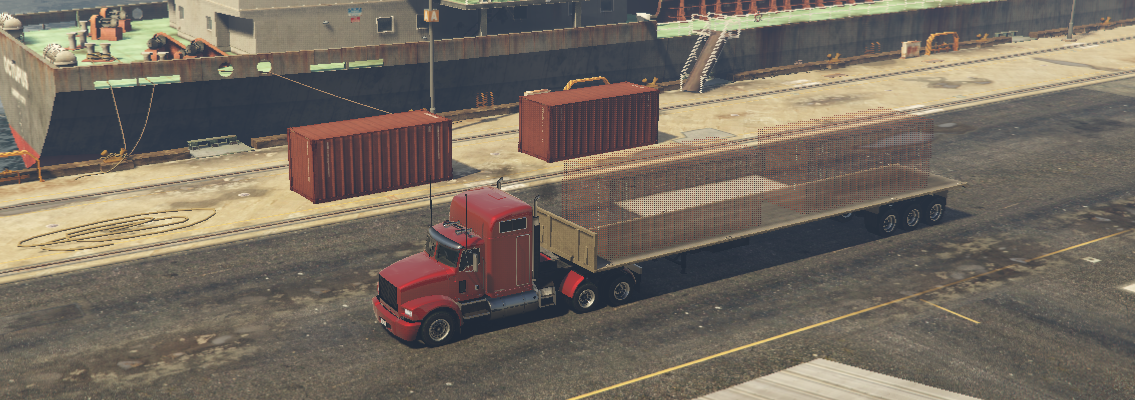
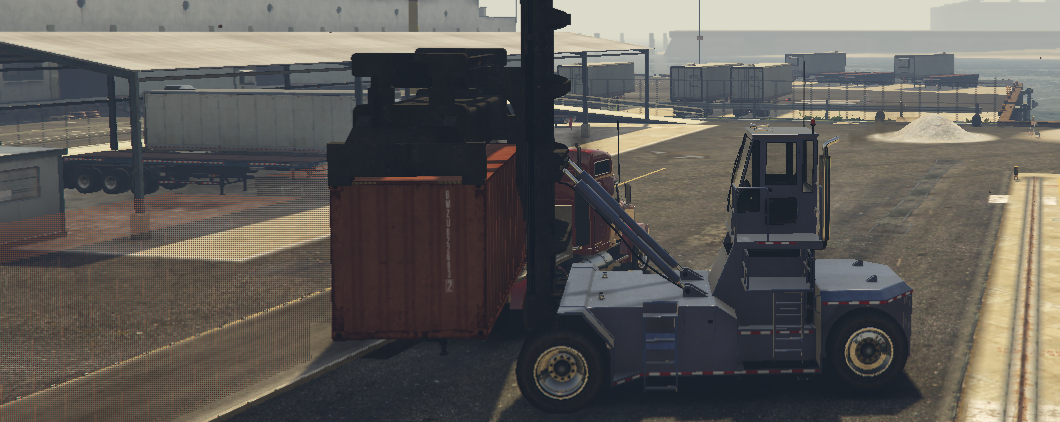
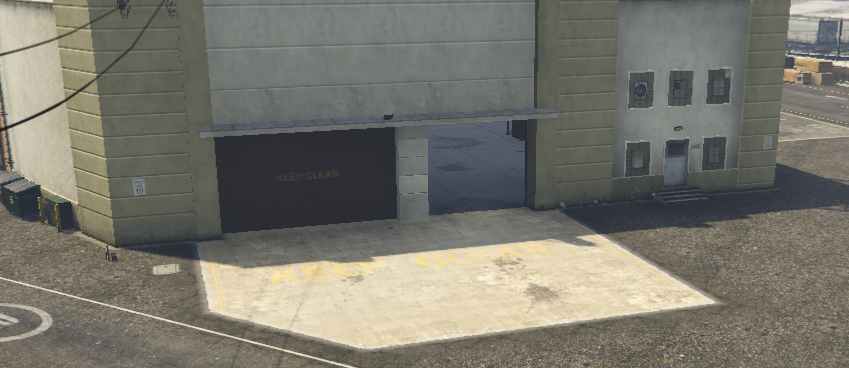
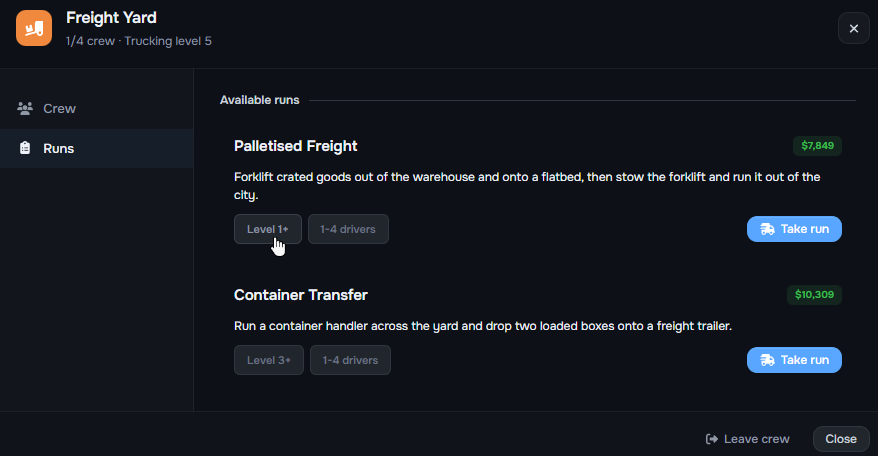
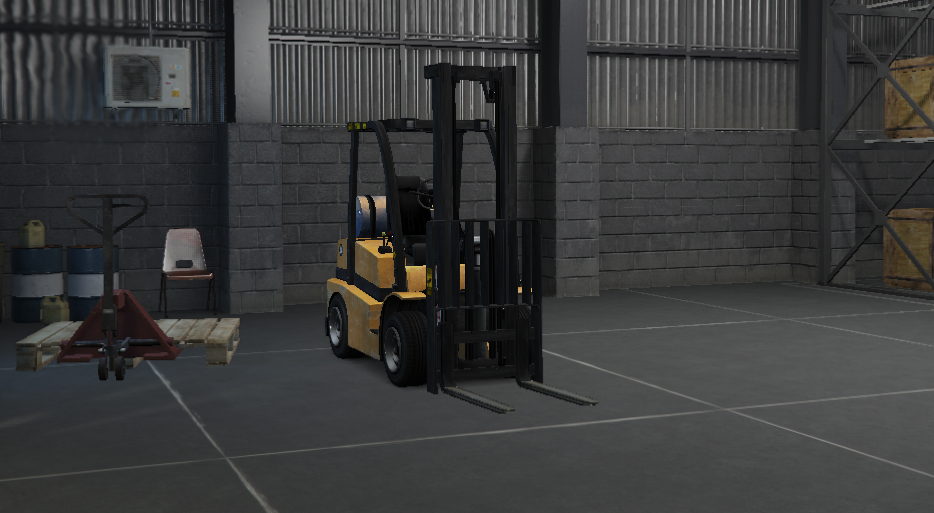
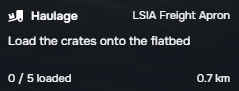
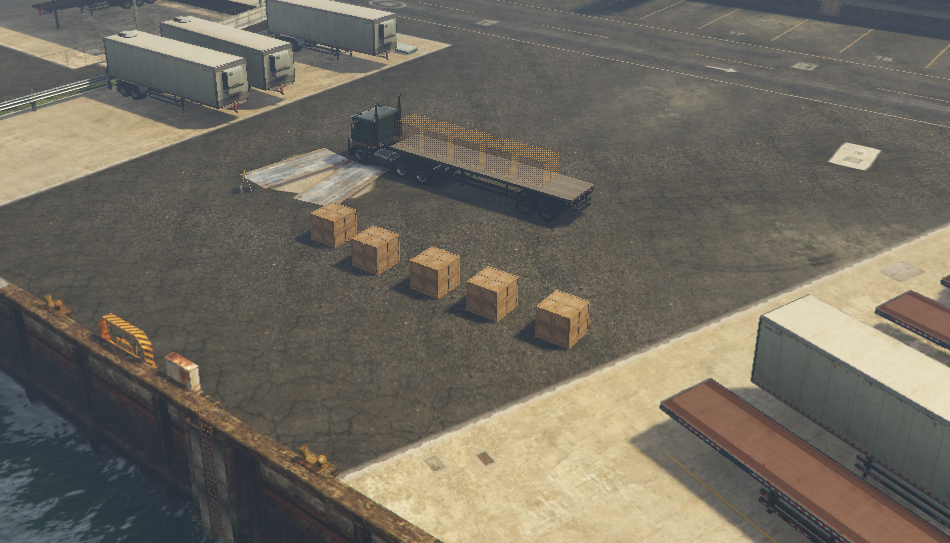
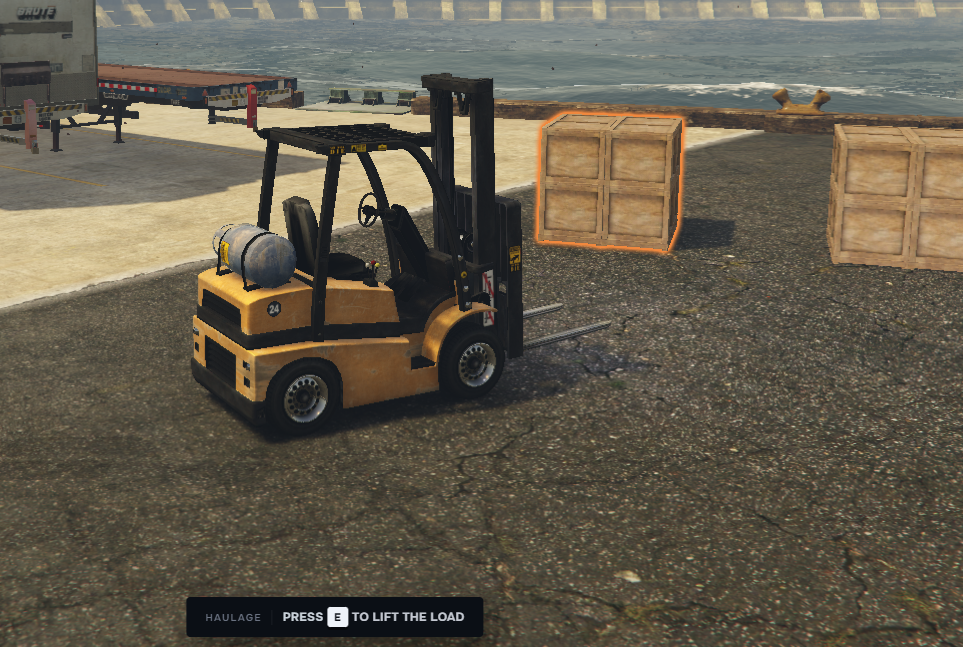
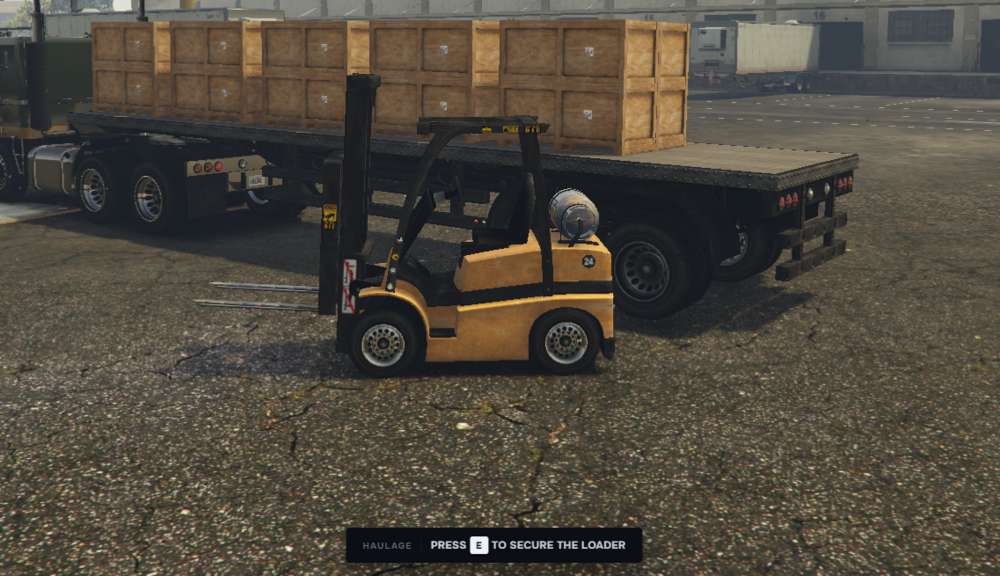
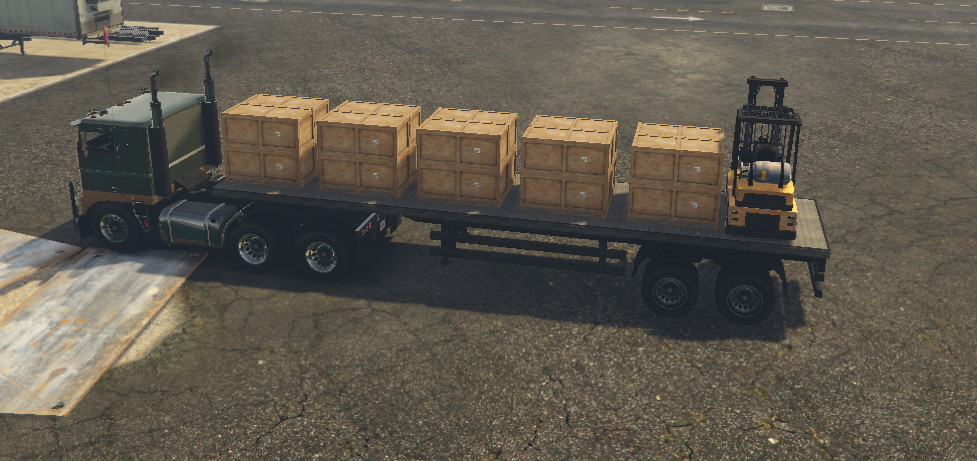
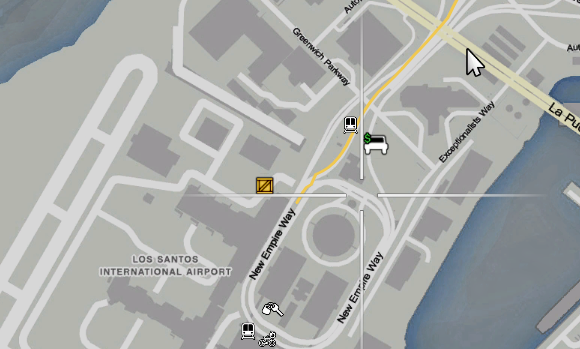
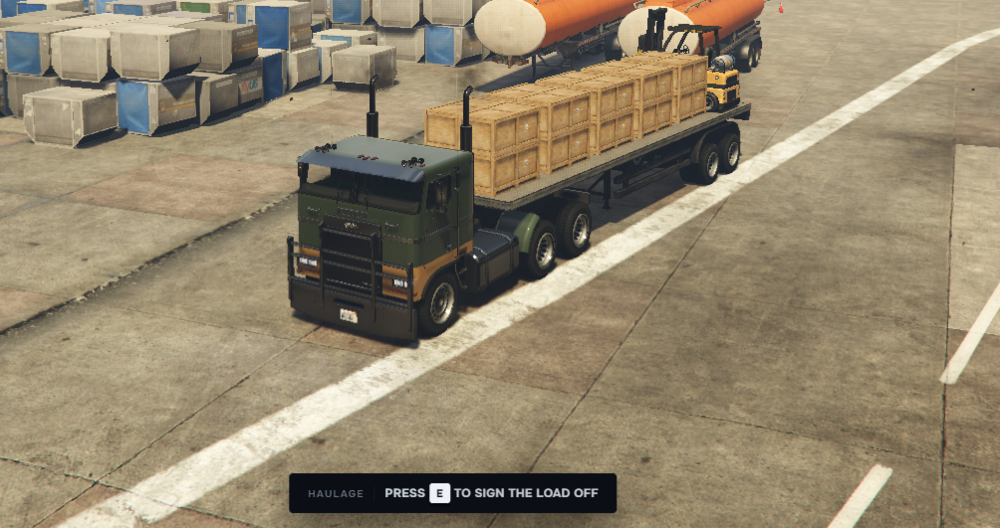
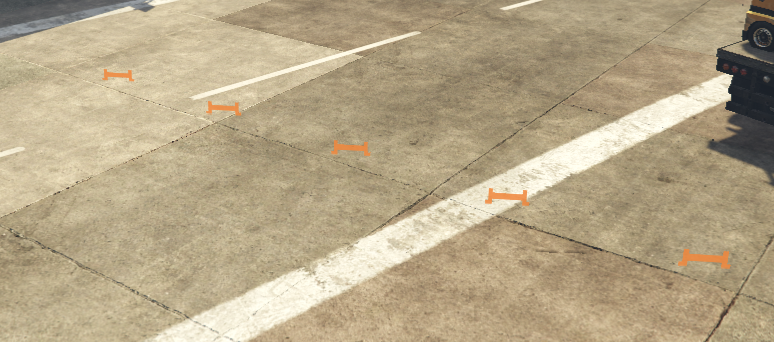
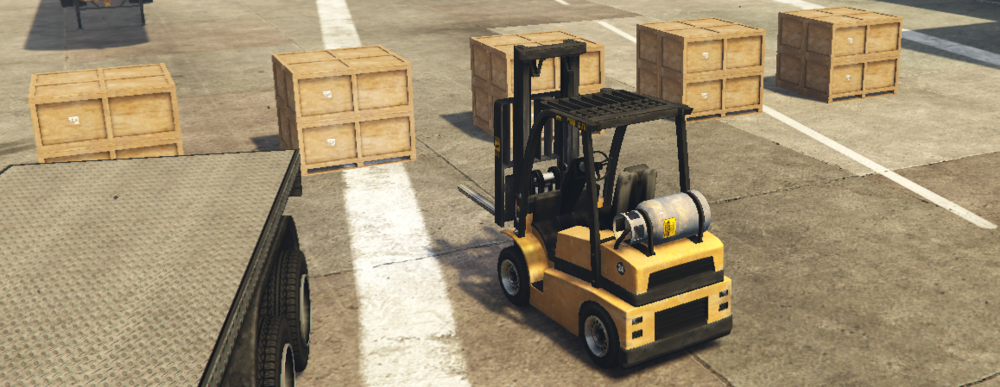
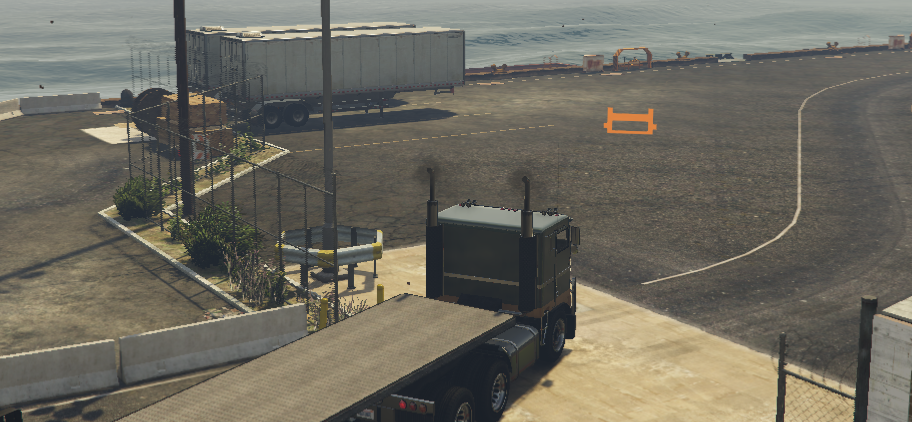
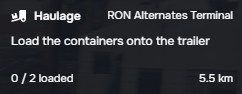
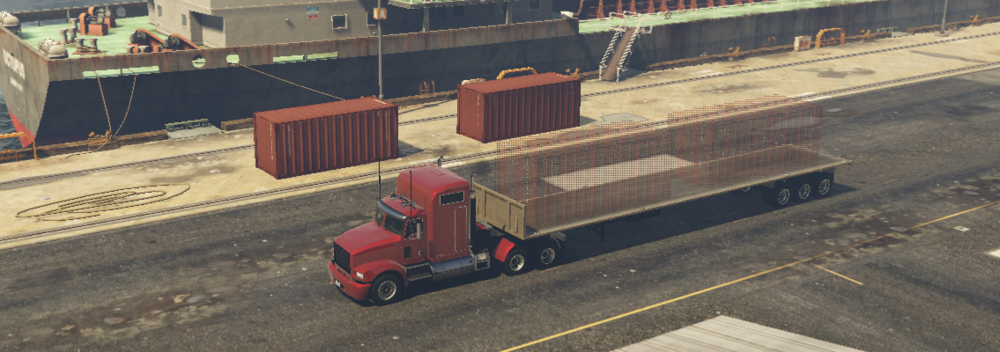
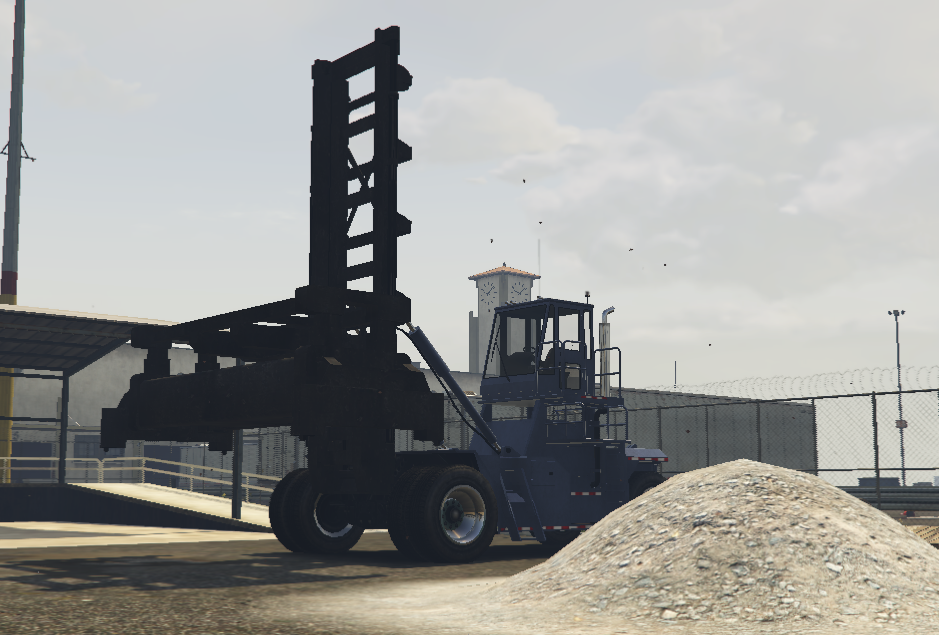
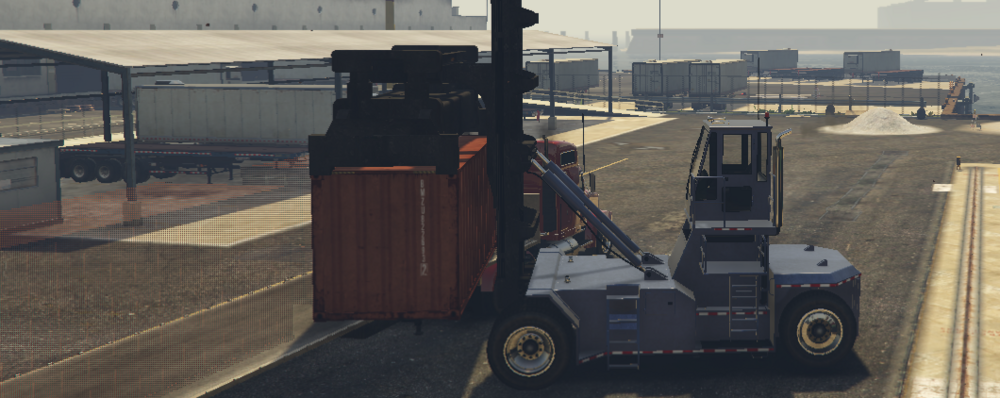
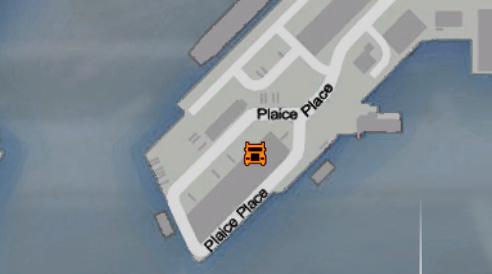
Roleplay Project · TRUCKER Job GUIDE [Picky 1108/26.01] Welcome to the Trucker Job on the RPP Server! The Trucker Job is a transport and logistics profession where players take on the role of a professional truck driver, delivering cargo across Los Santos and beyond. Starting with basic deliveries, drivers can gain experience, increase their job level, unlock new routes, and take on more demanding transportation contracts. Whether you're looking for a dependable way to earn money, want to build your career as a professional trucker, or simply enjoy exploring the roads while hauling different types of cargo, this guide will cover everything you need to know about the job. The Trucker Job features a progression system where new drivers begin with simpler assignments and gradually work their way toward longer routes, heavier loads, specialized cargo, and more rewarding contracts. As your experience grows, you'll gain access to better opportunities and more challenging deliveries. Each stage of the job introduces new routes, cargo types, requirements, and potential rewards. Some deliveries may require specific trucks or equipment, while others will test your ability to safely transport cargo over longer distances while maintaining efficiency and accuracy. As you advance through the ranks, you'll encounter more difficult routes, higher-value cargo, increased payouts, and additional responsibilities. Successful deliveries will help you build your reputation as a reliable driver and progress further within the trucking profession. What this guide covers: 🚛 How to start and work the Trucker Job 📈 How the trucker level and progression system works 📦 Basic cargo and delivery routes HOW TO START AND WORK THE TRUCKER JOB Before beginning your career as a Trucker, there are a few requirements and roleplay standards you must keep in mind. This job is built around realistic transportation and logistics work, so players are expected to portray the role appropriately and maintain a believable appearance and behavior throughout their shift. Suitable work clothing and appropriate footwear MUST be worn while working as a Trucker. When operating a truck, you are expected to maintain realistic roleplay and dress appropriately for the work you are performing. Professional truck driving involves long hours on the road, loading and unloading cargo, and working around heavy vehicles and transportation equipment. Your character should therefore be dressed as an actual professional truck driver would be. For example: 👕 Appropriate work clothing should be worn. 👞 Suitable and practical footwear must be worn. 🦺 High-visibility or safety clothing should be worn when required for loading, unloading, or working around the truck. 🧤 Protective equipment should be used when the delivery or cargo requires it. 🚫 Avoid wearing sportswear, suits, expensive formal clothing, or other outfits that would be unrealistic for professional trucking. 🚛 Do not operate a heavy truck while dressed in clothing that would not reasonably be worn by a professional truck driver. Your roleplay portrayal should remain realistic at all times. You cannot reasonably expect to operate a large commercial truck while wearing a designer suit, expensive formal clothing, or a sports outfit. Dress and behave as someone who is actually performing professional transportation work. This is not only about following the clothing requirement — it is about maintaining the overall roleplay quality and realism of the job. Treat your deliveries, vehicle, cargo, and responsibilities as you would if you were working as a real truck driver. Once you have met the requirements and arrived at the job location, you will be assigned a dedicated trucking vehicle for your shift. Before beginning your route, make sure you are familiar with the truck you will be operating. Keep in mind that you are driving a large commercial vehicle designed to transport cargo, not a standard passenger vehicle. Your driving style should reflect the truck's size, weight, and purpose. When operating your truck: Drive responsibly and realistically. Take the truck's size and handling into consideration. Allow yourself enough space when turning, stopping, and changing lanes. Avoid reckless, aggressive, or unnecessary driving. Do not treat the truck like a sports car or ordinary vehicle. Follow traffic laws and normal road etiquette. Maintain realistic roleplay while travelling between delivery locations. Be mindful of pedestrians, other drivers, and surrounding traffic. Drive according to the type of cargo you are transporting. The goal is to portray an actual professional truck driver completing a delivery route, rather than simply using the truck as a means of travelling from one location to another. Your driving, behaviour, and overall roleplay should reflect the responsibilities that come with operating a commercial vehicle. 📍 Finding the Trucker Job Location To begin your shift, you must first travel to the designated Trucker job location. On the map, look for the yellow Trashmaster truck icon: Once you arrive at the location, you can begin your trucker job. The exact procedure for starting your shift will be explained in the next step of this guide. From this point onward, you’ll be able to begin your trucking duties, access your assigned vehicle, choose from the available contracts and routes, and start delivering cargo throughout Los Santos. Once you arrive at the Trucker Job location, press E while standing at the job marker to open the Trucking Depot menu. This menu is where you’ll find all currently available contracts. Each contract will provide information about the available route and delivery, allowing you to choose the job you want to complete. After selecting a contract, you’ll be able to collect your assigned truck, follow the designated route, and begin your delivery. The menu will appear as follows: The Trucker Job features a ranking system that allows you to progress through different levels as you gain experience (XP) from completing trucking contracts and deliveries. You will start at Level 1 and can progress through the ranks by earning XP. The more deliveries you complete, the more experience you’ll gain and the higher your rank will become. Level 1 - 0 XP Level 2 - 400 XP Level 3 - 1,200 XP Level 4 - 3,000 XP Level 5 - 6,500 XP Your current XP and rank will determine which level of progression you have reached within the Trucker Job. As you continue completing contracts and gaining experience, you’ll advance through the ranking system and unlock access to higher levels of trucking progression. I. Palletised Freight (Level 0 – Level 3) Palletised Freight is one of the first freight options available to you as a trucker. This contract focuses on transporting palletised cargo using a forklift to load and unload the crates. ⓘ The entire route takes approximately 20-25 minutes when completed with proper roleplay I.II. Starting the Contract Once you select Palletised Freight, a forklift will automatically spawn at the starting location. You will need to take this forklift with you throughout the job, as it will be used to load and unload all of the crates. Shortly after starting the contract, you will also receive a process notification. This box will display your current task and show you what you need to do next. INFORMATION MENU ON YOUR RIGHT SIDE OF THE SCREEN -> I.III. Preparing Your Truck After accepting the contract, make your way to your assigned truck. Get inside and drive toward the back side of the warehouse, where your cargo is waiting to be loaded. Position your truck carefully and park it in a suitable location that gives you enough space to operate the forklift around the vehicle. Make sure the truck is positioned properly before beginning the loading process. A good parking position will make loading the crates much easier and more efficient. I.IV. Loading the Crates Once your truck is parked, exit the vehicle and get into your forklift. Drive the forklift toward the crates that need to be loaded onto your truck. As you approach a crate, an interaction message will appear, allowing you to pick it up. Press E to load the crate onto your forklift. Once the crate has been picked up, carefully drive the forklift toward your truck. Position yourself correctly next to the truck and use the interaction prompt to place the crate onto the truck. Press E again to load the crate onto your truck. Repeat this process one crate at a time until all of the required crates have been loaded. ROLEPLAY NOTE: Make sure to properly roleplay the loading process. Take your time when operating the forklift and avoid rushing through the interactions! I.V. Securing the Forklift Once all of the crates have been loaded, you will need to take the forklift with you for the unloading process at your destination. Drive the forklift toward your truck and position it at the designated loading area. When you are close enough to the truck, an interaction prompt will appear. Press E to secure the forklift on top of the truck. ⓘ IMPORTANT: Do not leave the forklift! You will need it at the unloading location to unload the cargo! I.VI. Driving to the Delivery Location Once your forklift is secured and everything is ready, it's time to head toward the unloading location. The destination will be clearly marked on your map/GPS, so follow the route to the designated delivery point. Drive safely and remember to properly roleplay your journey. This contract is designed to be completed as a realistic trucking job rather than simply rushing from one location to another. I.VII. Arriving at the Unloading Location Once you arrive at the unloading location, you will receive a notification informing you that you can begin unloading your cargo. After receiving the notification, exit your truck. You will then need to unload your forklift from the truck. Approach the truck and press E when the interaction prompt appears to unload the forklift. Once the forklift is unloaded, you can begin unloading the crates. I. VIII. Unloading the Crates After unloading the forklift, you will notice information icons showing you where the cargo needs to be delivered. Take your forklift and drive toward the designated unloading areas. Approach the required crate and use the interaction prompt to pick it up. Press E to load the crate onto your forklift. Carefully drive the crate to the designated unloading location. Once you are in the correct position, press E to unload the crate. Continue this process until all of the crates have been successfully unloaded.Remember to take your time and properly roleplay the use of the forklift throughout the entire process. I.IX. Loading the Forklift Back Onto the Truck Once all of the cargo has been unloaded, your job at the delivery location is almost complete. Before leaving, you must load the forklift back onto your truck. Drive the forklift back toward your truck and position it in the designated area. When the interaction prompt appears, press E to load the forklift back onto the truck. Make sure the forklift is properly secured before leaving the delivery location. I.X. Returning to the Starting Location With the cargo successfully delivered and the forklift secured, it's time to return to the original job location. Follow the route displayed on your map and drive back to the starting area. Once you arrive, look for the orange mission marker. Drive your truck into the orange marker and press E to complete the contract. After completing the interaction, your Palletised Freight contract will be successfully completed and you will receive the appropriate rewards and XP. II. Container Transfer (Level 3+) Container Transfer is the second freight sector available to truckers, becoming accessible once you reach Level 3. Compared to Palletised Freight, this contract introduces a different truck, a larger loading area, and specialized machinery for handling shipping containers. The job requires you to carefully load the containers onto your trailer, transport them to the assigned destination, unload them, and return to the depot to complete your shift. ⓘ The entire route takes approximately 40-45 minutes when completed with proper roleplay INFORMATION MENU ON YOUR RIGHT SIDE OF THE SCREEN -> II.I. Selecting Container Transfer Open the Trucker Job menu the same way you did when selecting your first freight contract. From the available delivery options, select Container Transfer. Once selected, you will receive a different truck specifically designed for transporting containers. II.II. Driving to the Loading Area After receiving your truck, drive toward the designated container loading area. The loading location is larger than the one used for Palletised Freight and features specialized equipment designed specifically for moving shipping containers. Position your truck and trailer carefully inside the loading area. Make sure you leave enough space around your trailer so the loading machinery can easily access it and place the containers correctly. ⓘ ROLEPLAY TIP: Take your time when positioning your trailer. Proper parking will make the container loading process much easier and more realistic. II.III. Loading the Containers Once your truck is positioned correctly, exit the vehicle and make your way to the container loading machine. This machinery will be used to pick up and place the containers onto your trailer. Approach the loading machine and begin the loading process. Just like with the previous freight sector, follow the interaction prompts and press E when prompted to pick up and load the containers. Carefully position the loading machine over the trailer and place the container in the designated position. Repeat the process until all required containers have been loaded onto your trailer. ⓘ IMPORTANT: Unlike the Palletised Freight contract, you do not need to load the container loading machine onto your truck. The machine is too large to be transported and will remain at the loading facility once you have finished loading your containers. II.IV. Preparing for Delivery Once all containers have been loaded, return to your truck and check your map for the assigned delivery location. The destination for Container Transfer is not fixed. This means that the delivery location can change from one contract to another, so always check your map after loading your containers to see where your current delivery is located. Once you have identified your destination, get behind the wheel and begin your journey. Follow the GPS and drive carefully toward the assigned delivery location. II.V. Arriving at the Delivery Location When you arrive at the designated delivery location, position your truck in the appropriate area. Once you are in position, you will be able to interact with the delivery point. Press E to sign off and confirm the delivery of your load. After signing off the load, you will be able to begin the container unloading process. II.VI. Unloading the Containers Once the delivery has been confirmed, follow the prompts provided at the unloading location. The containers will then be unloaded from your trailer using the available equipment. Follow the same general procedure used during the previous freight contract: approach the required interaction point and press E whenever prompted. Continue the process until all containers have been successfully unloaded. Once the entire load has been delivered, your delivery portion of the contract is complete. II.VII. Returning to the Depot With all containers successfully unloaded, it's time to return to the Trucker Job depot. Follow the route displayed on your map and drive back to the depot. Once you arrive, enter the designated completion area and follow the interaction prompt to finish your contract. After completing the final interaction, your Container Transfer contract will be completed, and you will receive your payment and XP for the completed delivery. ! Your shift starts here! Put on your uniform, get behind the wheel, and hit the road. Every delivery completed, every container transported, and every route finished brings you one step closer to becoming one of Los Santos' most reliable truckers. Stay safe, drive responsibly, and keep those deliveries moving! [Picky 1108/26.01]

-
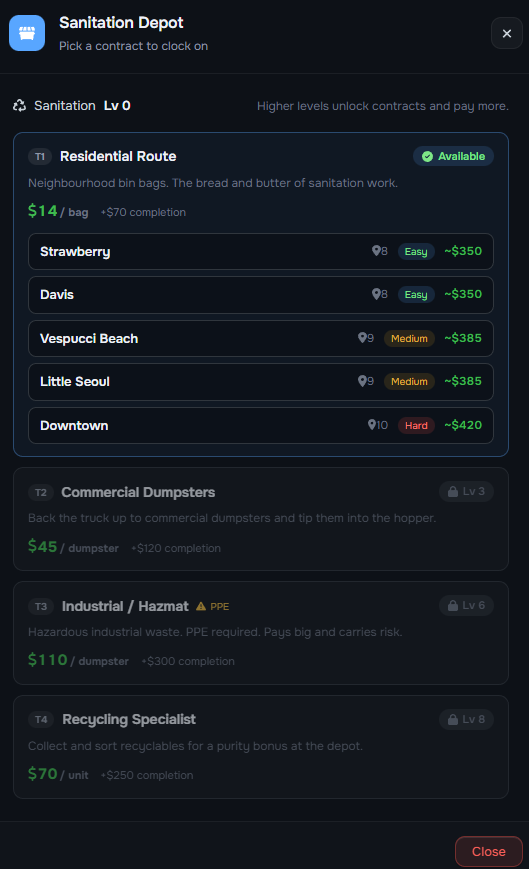
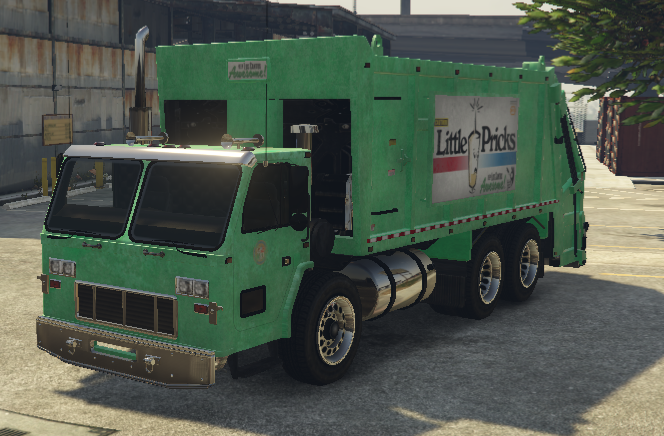
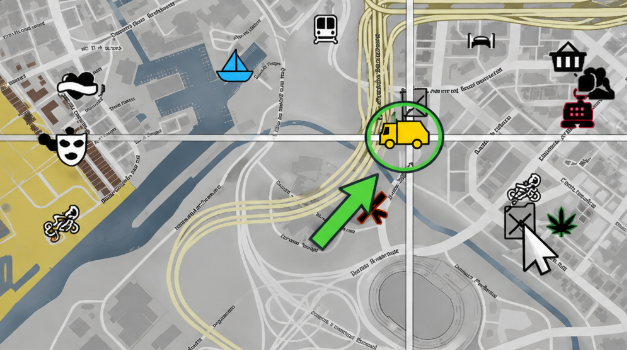
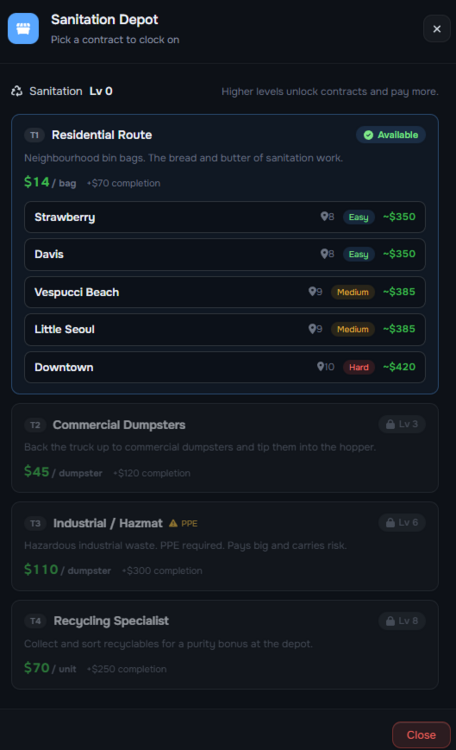
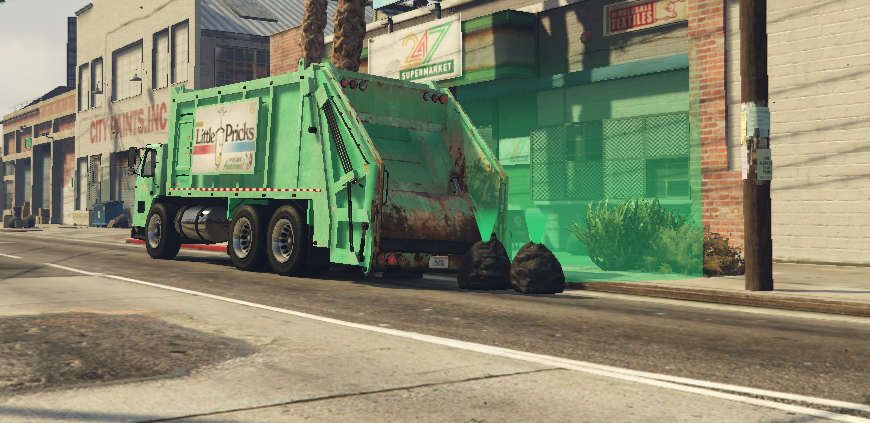
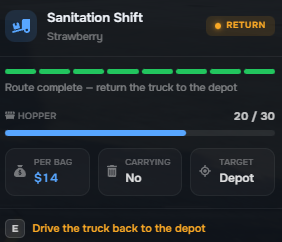
Roleplay Project · Trashmaster Job GUIDE [Picky 1108/26.01] Welcome to the Trashmaster Job on the RPP Server! The Trashmaster job is a sanitation and waste-management profession where players take on the responsibility of keeping Los Santos clean. Starting from basic residential garbage collection, employees can build experience, increase their job level, and eventually gain access to more advanced and specialized waste-management routes. Whether you're looking for a reliable way to earn money, want to work your way through the Trashmaster progression system, or simply enjoy driving around Los Santos while keeping the city clean, this guide will walk you through everything you need to know. The job is divided into several stages of progression, with each stage introducing different types of waste, routes, challenges, and rewards. New employees begin at Level 0, working on Residential Routes, and can progress toward more advanced assignments such as Commercial Dumpsters, Industrial / Hazmat, and Recycling Specialist work. As you progress, you'll encounter different route difficulties, higher payouts, additional requirements, and specialized mechanics. Some assignments may require specific equipment or careful handling, while others reward accuracy and efficiency. What this guide covers: 🗑️ How to start and work the Trashmaster job 📈 How the job's level progression works 🏘️ Residential garbage collection 🏢 Commercial dumpster collection ☣️ Industrial and Hazmat waste ♻️ Recycling and sorting How to start and work the Trashmaster job Before beginning your career as a Trashmaster, there are a few requirements and roleplay standards you must keep in mind. This job is designed around realistic sanitation work, so players are expected to portray the role appropriately and maintain a believable appearance and behavior throughout their shift. 👕 Dress Appropriately for the Job High visibility clothing, protective footwear and gloves MUST be worn at all times. When working as a Trashmaster, you are expected to maintain realistic roleplay and dress appropriately for the work you are performing. Trash collection is a physically demanding job carried out around heavy machinery, garbage, roads, and potentially hazardous materials. Your character should therefore be dressed as an actual sanitation worker would be. For example: 🦺 High-visibility work clothing should be worn. 🥾 Appropriate protective footwear must be worn. 🧤 Protective gloves must be worn. 👷 Your overall appearance should be suitable for sanitation work. 🚫 Avoid wearing sportswear, suits, expensive formal clothing, or other outfits that would be unrealistic for the job. 🚫 Do not operate the Trashmaster while dressed in clothing that would not reasonably be worn by a sanitation worker. Your roleplay portrayal should remain realistic at all times. You cannot reasonably expect to operate a large garbage truck while wearing a designer suit, expensive formal clothing, or a sports outfit. Dress and behave as someone who is actually performing sanitation work. This is not only about following the clothing requirement — it is about maintaining the overall roleplay quality and realism of the job. Once you have met the requirements and arrived at the job location, you will be operating a dedicated Trashmaster vehicle. This is the vehicle you will be operating during your Trashmaster shifts: Make sure you are familiar with the vehicle before beginning your route. Remember that you are operating a large commercial garbage truck, not a normal passenger vehicle, so your driving should reflect its size and purpose. When driving the Trashmaster: Drive responsibly and realistically. Take the vehicle's size into consideration. Avoid reckless or unnecessary driving. Do not treat the garbage truck like a sports car. Follow normal traffic laws and road etiquette. Maintain realistic roleplay while travelling between collection locations. Be mindful of pedestrians and other road users. The goal is to portray an actual sanitation worker completing their daily route, rather than simply using the vehicle as a means of getting from one location to another. 📍 Finding the Trashmaster Job Location To begin your shift, you must first travel to the designated Trashmaster job location. On the map, look for the yellow Trashmaster truck icon: \ When checking the list of locations on your map, the job will appear as ( This is the location where you will go to begin your Trashmaster shift): : Once you arrive at the Davis Waste Management location, you can proceed with starting your job. The exact interaction/start procedure will be explained in the next step of this guide. From this point onward, you will be able to begin your Trashmaster duties, obtain your assigned vehicle, select your available route, and start collecting waste throughout Los Santos. Once you arrive at the Trashmaster job location, press E at the job marker to open the Sanitation Depot menu. This menu is where you will see the contracts currently available to you. It will be displayed like this: At Level 0, as shown in the picture, only the T1 — Residential Route is available. Higher-level contracts remain locked until you progress through the Sanitation job. The Residential Route gives you several route options, each with a different difficulty, number of pickup points, estimated payout, and overall travel time. For this guide, we will begin with the Easy route. 🟢 Easy Routes Easy routes are designed to be the quickest and simplest option. The pickup points are generally close to one another, meaning you will spend less time driving between locations and can complete the route more efficiently. As shown in the menu, Easy routes currently have 8 pickup points. Strawberry — 8 pickups — ~$350 Davis — 8 pickups — ~$350 🟡 Medium Routes Medium routes contain 9 pickup points and require more driving than Easy routes. The pickup locations are further apart, meaning you will spend more time travelling between each stop. The additional distance and extra pickup mean that these routes take longer to complete, but they also provide a higher payout. Vespucci Beach — 9 pickups — ~$385 Little Seoul — 9 pickups — ~$385 🔴 Hard Routes Hard routes contain 10 pickup points and are the longest Residential Routes currently available. The locations are further apart and you will need to spend more time travelling between pickups. However, Hard routes provide the highest payout of the three difficulty levels. Downtown — 10 pickups — ~$420 The general rule is simple: the harder and longer the route, the more you can earn. However, a higher-paying route will also require more time and more driving. 🚛 Take Care of Your Vehicle While working your route, drive carefully and look after the Trashmaster you are operating. Any damage sustained by your work vehicle can negatively affect the income you receive from the route. Therefore, reckless driving, collisions, and unnecessary damage can directly reduce your earnings. Treat the Trashmaster like a real commercial vehicle: Drive carefully between pickup locations. Avoid unnecessary collisions. Be mindful of other vehicles and pedestrians. Don't drive recklessly simply because you are trying to finish faster. Take extra care when reversing or manoeuvring the truck. Keep the vehicle in good condition throughout your route. ⓘ Remember: finishing a route quickly is not necessarily more profitable if you damage the truck along the way. Drive safely, complete your pickups, and protect your earnings. Collecting Trash Bags Once you have selected your route and started your shift, your first pickup location will be marked for you. Follow the route to the designated pickup point and look for the trash bags marked with a green blip. The green blip indicates your current objective and shows you exactly where the garbage needs to be collected. 📍 1. Arrive at the Pickup Point When you arrive at the first location, you will find the designated trash bags near the green pickup area. Before getting out of your vehicle, make sure you position the Trashmaster correctly. 🚛 Park the Trashmaster Properly The Trashmaster loads garbage from the rear of the vehicle, so you need to park in a position that gives you enough space to work from the back. Try to: Park close enough to the trash bags to make the collection convenient. Keep the rear of the Trashmaster facing the pickup area. Avoid parking at an angle that makes it difficult to reach the rear of the truck. Do not block the road unnecessarily. Take your surroundings and other road users into consideration. Proper parking will make the collection process much easier and will also help maintain realistic roleplay. ⚠️ Important: Do not simply stop wherever you happen to be. Remember that you are operating a large garbage truck, and positioning the vehicle correctly is part of realistically performing the job. 🗑️ 2. Collect the Trash Bag Once the Trashmaster is parked correctly, approach the trash bag marked with the green blip. Stand close to the bag and press E to pick it up. After pressing E, your character will pick up the trash bag and you can carry it toward the rear of the Trashmaster. 🚮 3. Throw the Bag Into the Trashmaster Once you have picked up the garbage bag, carry it to the rear of the Trashmaster. Make sure you are positioned correctly at the loading area, then press E again to throw the trash bag into the truck. 🔄 4. Continue to the Next Pickup Once the first trash bag has been loaded, continue following your route to the next pickup location. Repeat the same process at every stop: 📍 Follow the marker → 🚛 Park correctly → 🗑️ Pick up the bag → E → 🚮 Throw it into the Trashmaster → E → ➡️ Continue to the next location. Progress bar will show you, how many pick-up points you have to do: Continue until all pickup points on your selected route have been completed. Once you have successfully collected all of the trash bags required for your selected route, your collection portion of the job is complete. Open your map and follow the yellow blip to the designated return location. This is the location where you will finish your Trashmaster route. Drive your Trashmaster back to the marked area and position the vehicle appropriately. Take care when returning to the depot. Your vehicle can still be damaged while travelling back, and vehicle damage can affect the amount of money you receive. 🟡 2. Enter the Payment Area Once you arrive at the yellow marker, make sure you are inside the designated area. You will then be able to interact with the completion point. 💵 3. Collect Your Payment When you are at the yellow blip, press E to complete the route and collect your payment. Your earnings will then be awarded for successfully completing the route. The amount you receive depends on the route you selected and may be affected by the condition of your Trashmaster. How the job's level progression works The Trashmaster job uses an XP-based leveling system. You start at Sanitation Level 0 and earn XP by completing contracts. Each level requires 500 XP to reach the next one. 🔓 Contract Unlocks: Level 0 — 🗑️ Residential Route Level 3 — 🏢 Commercial Dumpsters Level 6 — ☣️ Industrial / Hazmat — PPE required Level 8 — ♻️ Recycling Specialist As your level increases, you unlock new contracts with different mechanics and higher potential earnings. 500 XP is required for every level, so simply continue completing available contracts to progress through the Sanitation ranks. ⓘ 🏢 Commercial Dumpsters & ☣️ Industrial / Hazmat - you do not need to exit your Trashmaster! Simply drive to the designated dumpster location, position your vehicle correctly, and press E to honk. The dumpster will be handled automatically, allowing you to continue to the next location. ♻️ Recycling Specialist The Recycling Specialist contract works differently. For this contract, you must exit the vehicle because you need to physically collect the recycling bags. You will need to: Park the vehicle properly. Exit the Trashmaster. Collect the designated bags. Load them as required. Continue to the next collection point. Your shift starts here! Put on your uniform, get behind the wheel, and do your part to keep Los Santos clean. Every bag collected, every dumpster emptied, and every route completed brings you one step closer to becoming a Trashmaster. [Picky 1108/26.01]

-
Yeah, just thought of it, it's really amazing idea!